Account Registration
Octo's cost and usage data rely on the registered cloud service provider's account. In the account page, CSP's accounts are registered, listed, updated and deleted.
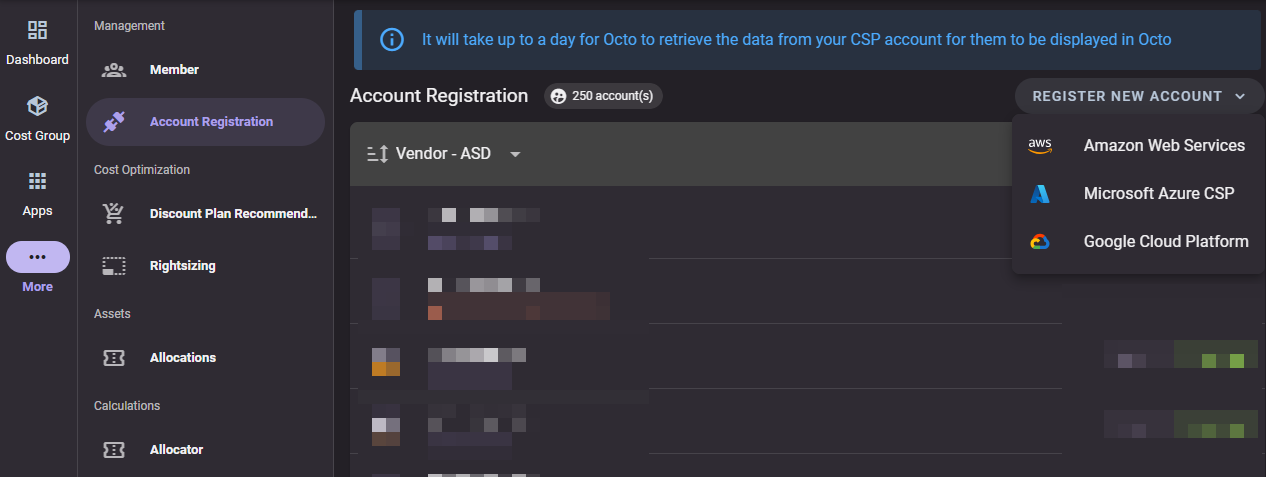
Registering an account
Account registration enables the user to register the source of data in Octo. As of now, Octo supports AWS, Azure and GCP vendors. This is only accessible to admin users.
After successful account registration, it will take up to a day for Octo to retrieve the data from your CSP account for them to be displayed in Octo.
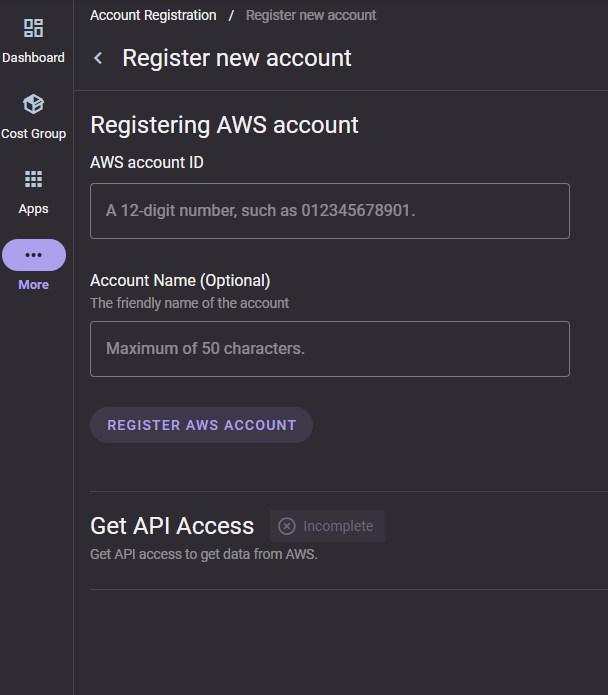
The following are the steps for AWS account registration:
-
Register AWS ID and Name.
- This is the start of the account registration. Please input the 12-digit AWS account number. For the account name, this is optional. You can set any name for easy management of the accounts.
-
Setup API access.
- Setting up the API access, lets Octo pull some data from your AWS account through API access.
a. Click the "Open AWS launch page" button. The AWS launch page will open in a new tab. Enter the required information and launch. This will open a cloudformation template for deployment into your AWS account. Required details for the deployment are already pre-filled.
b. Make sure to select the correct account to be used for deployment. By default, CloudFormation template is deployed on us-east-1 region.
c. Please check default values when creating stack.
-
Stack name (You can retain the value or input your desired stack name.)
-
ExternalId (Do not change.)
-
Principal (Do not change.)
d. Tick the checkbox to agree the
I acknowledge that AWS CloudFormation might create IAM resources with custom names.message.e. After checking the stack details, click
Create stackbutton.f. Once deployment is already successful, please return to the account registration page and press the "Confirm" button. Once everything is successful, status of the API access is set to
Completed. -
Setup CUR and S3 Bucket (for payer accounts only).
-
Setup Payer Account (for linked accounts only).
- For linked accounts, you have to specify the payer account. There is no need to do this on payer accounts.


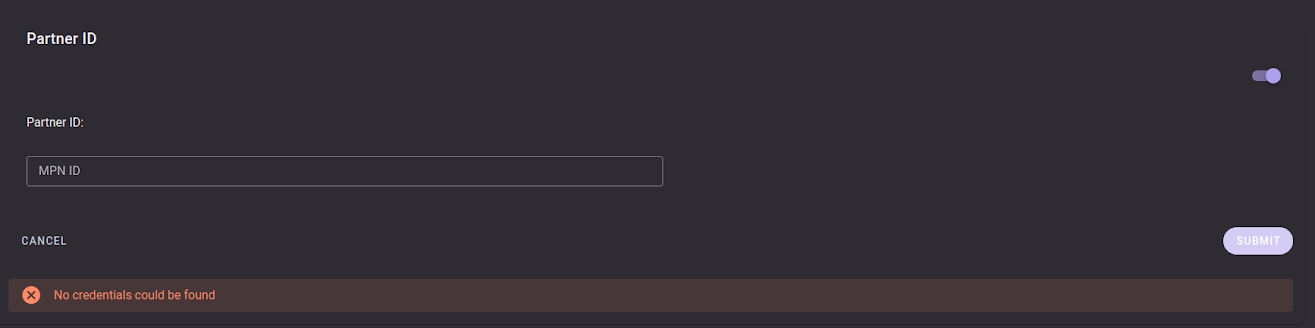
The following are the steps for Azure Csp account registration:
1. Input your Microsoft Partner ID, then click Submit.
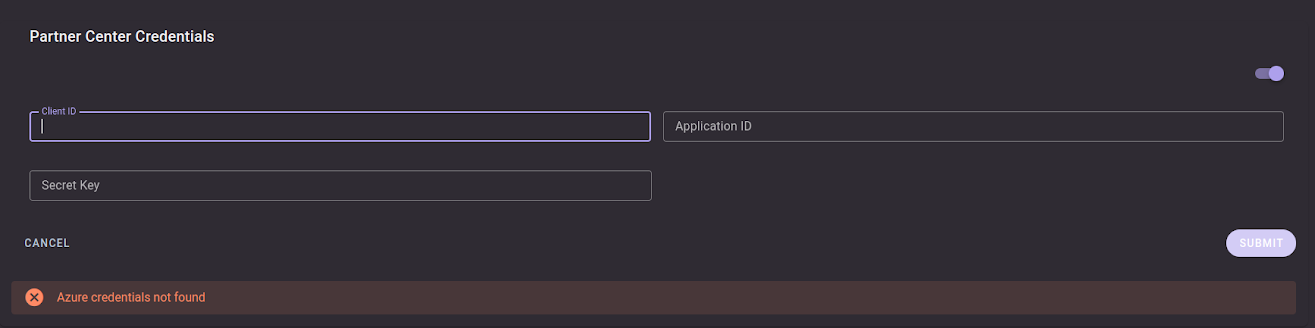
2. Setup Partner Center Credentials:
a. Click the toggle button to edit Partner Center Credentials form.
b. Input the Client ID, Application ID, and Secret Key and hit Submit.
3. Setup Partner API Credentials:
a. Click the toggle button to edit Partner API Credentials form.
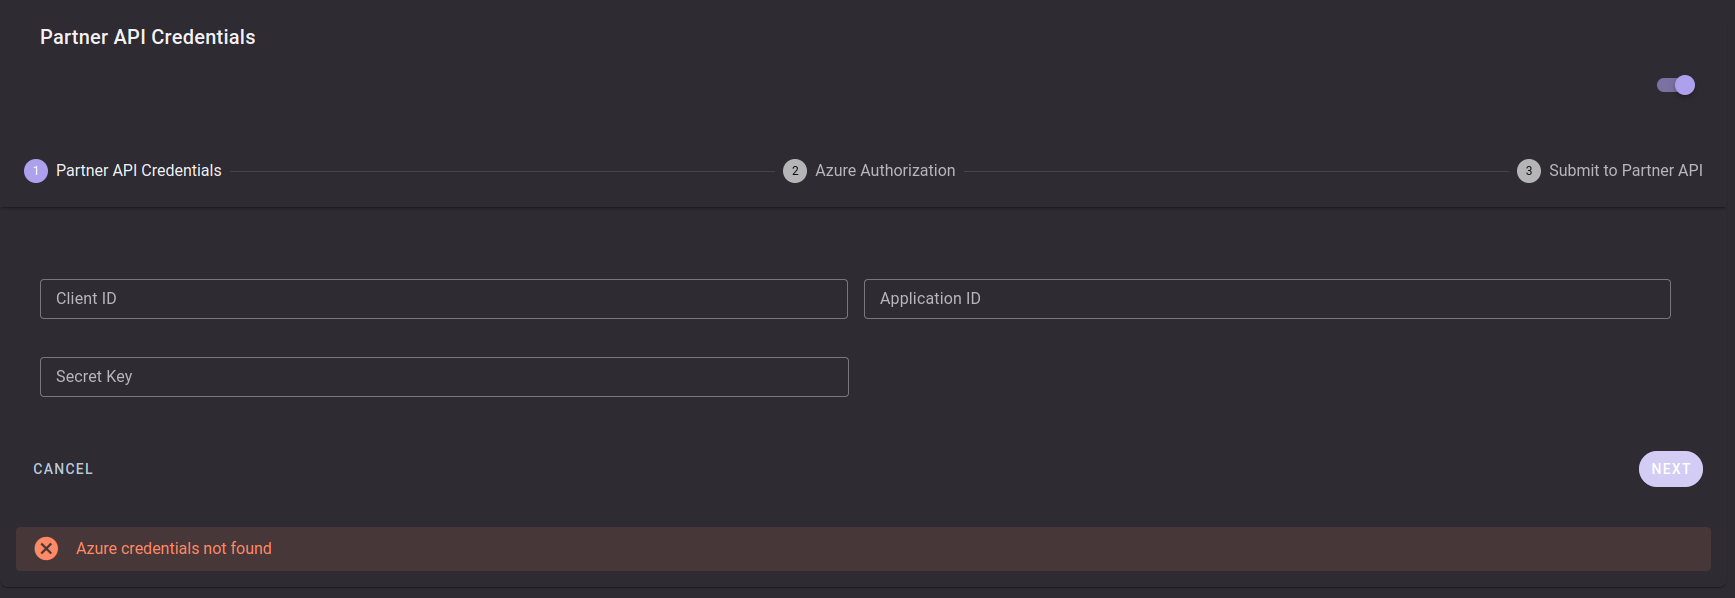
b. Input the Client ID, Application ID, and Secret Key and hit Next.
c. A tab will open which needs you to log in to your Microsoft Azure account and input the required information. After this step this will redirect back to Octo with an authorization code.
d. For the last step, review the information including the authorization code obtained from the previous step then hit Submit.

Export Billing Data to BigQuery
In order for Octo to help you with managing your Google Cloud Platform bills, you need to first export your billing data to BigQuery. This lets Octo see all the details of your cloud spending, so it can give you the best advice on how to save money and manage costs effectively.
If you have already exported your data to BigQuery, you can skip this step and proceed to the next one. If not, you can follow the instructions below.
-
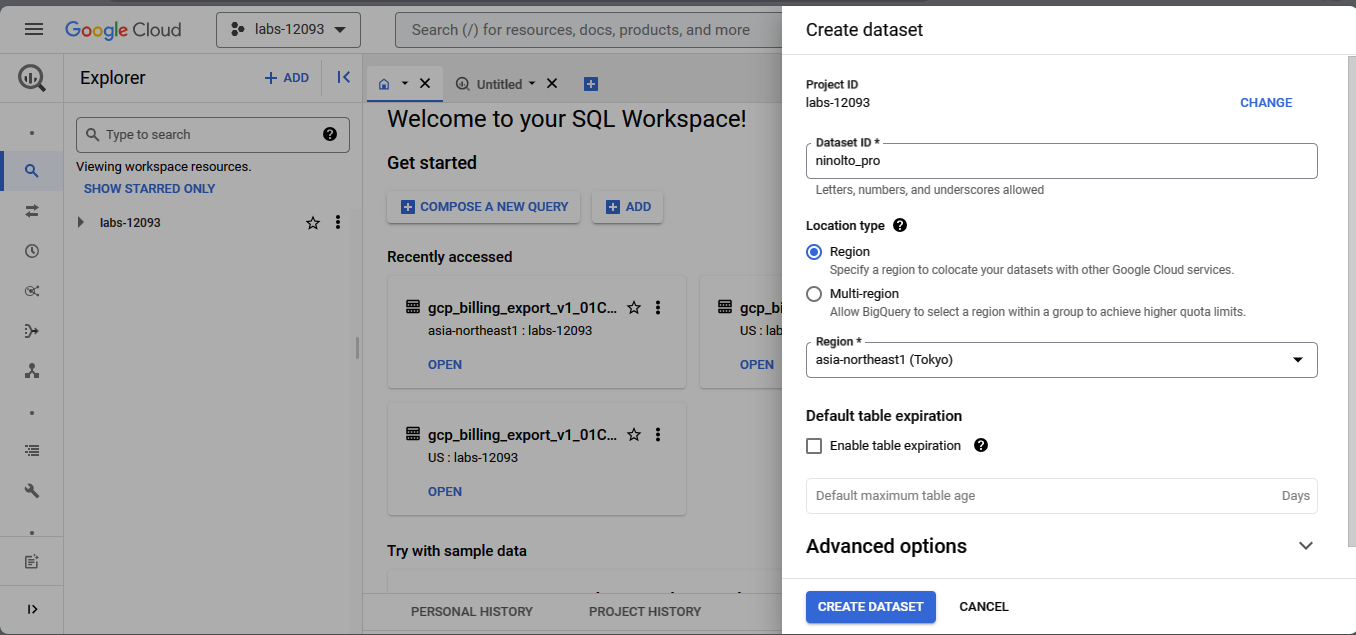
Choose the Project ID you want to save the dataset to the BigQuery.
It is recommended to create a project for hosting Cloud Billing exports, as this facilitates efficient management and organization of billing data.
-
Go to BigQuery, click the three vertical dots then Create Dataset.
-
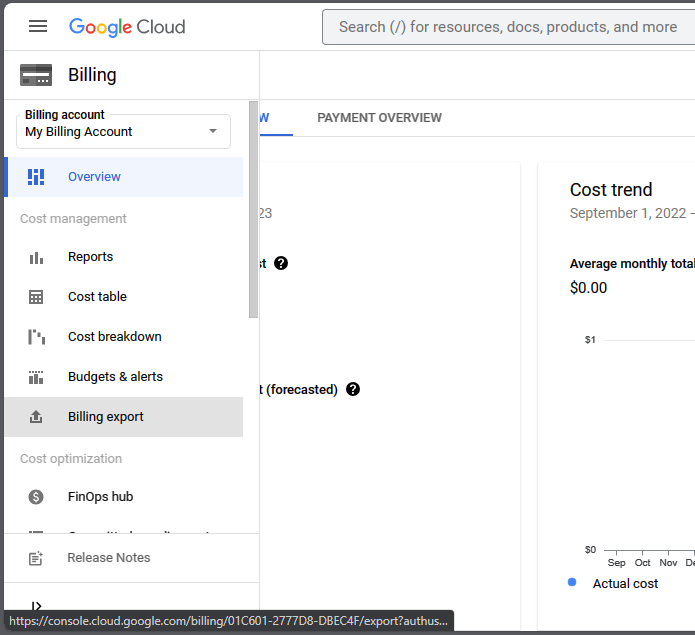
Go to Billing and Select Billing Export
-
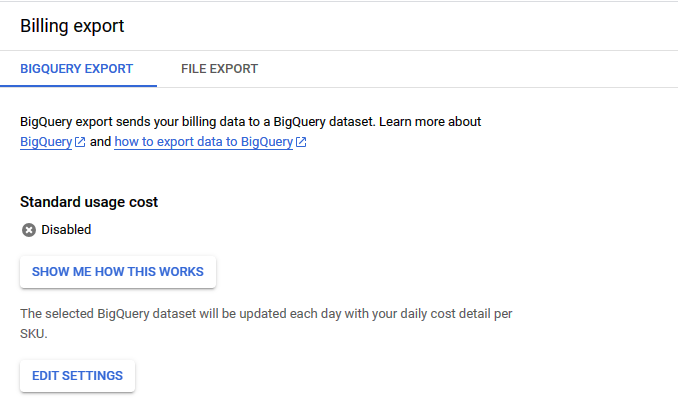
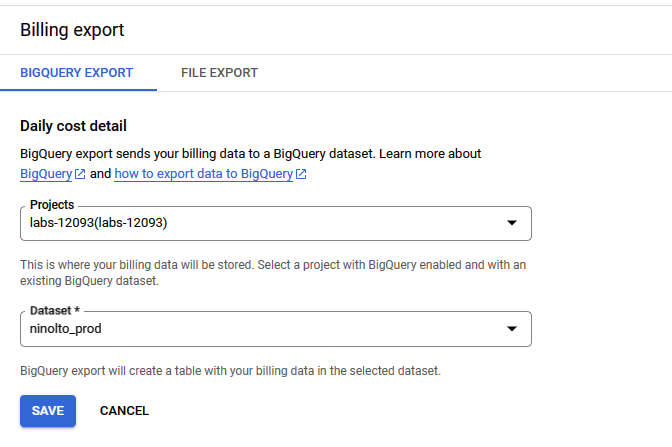
Select the
BIGQUERY EXPORTtab and clickEDIT SETTINGSunder theStandard Usage Costsection. -
In the
Projectsinput, select the Project ID where the dataset is saved. For the "Dataset" input, choose the dataset that you've created, and then clickSAVE.

Add BigQuery Permission
-
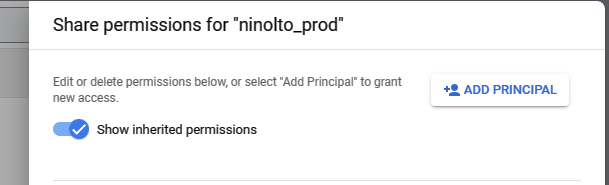
After completing the previous step, return to BigQuery and locate the dataset created. Click the three vertical dots next to the dataset name, then click
Share -
Click Add Principal and use the Alphaus service account provided below and assign the "BigQuery Data Viewer" role to it, then click "Save."


Register Billing Account to Octo
Proceed to OCTO and complete the registration of your billing account by entering the required information into the input fields. Click REGISTER BILLING ACCOUNT button to register.

Billing Account ID - Your GCP Billing Account ID should follow a format similar to 0D1DR5-ADE21G-RF09W.
Project ID - Your Project ID that hosts the BigQuery Dataset.
Dataset Name - The name of the BigQuery Dataset you created.
Dataset Region - The dataset's region or location, which can be found within the Dataset Info section.
Account List
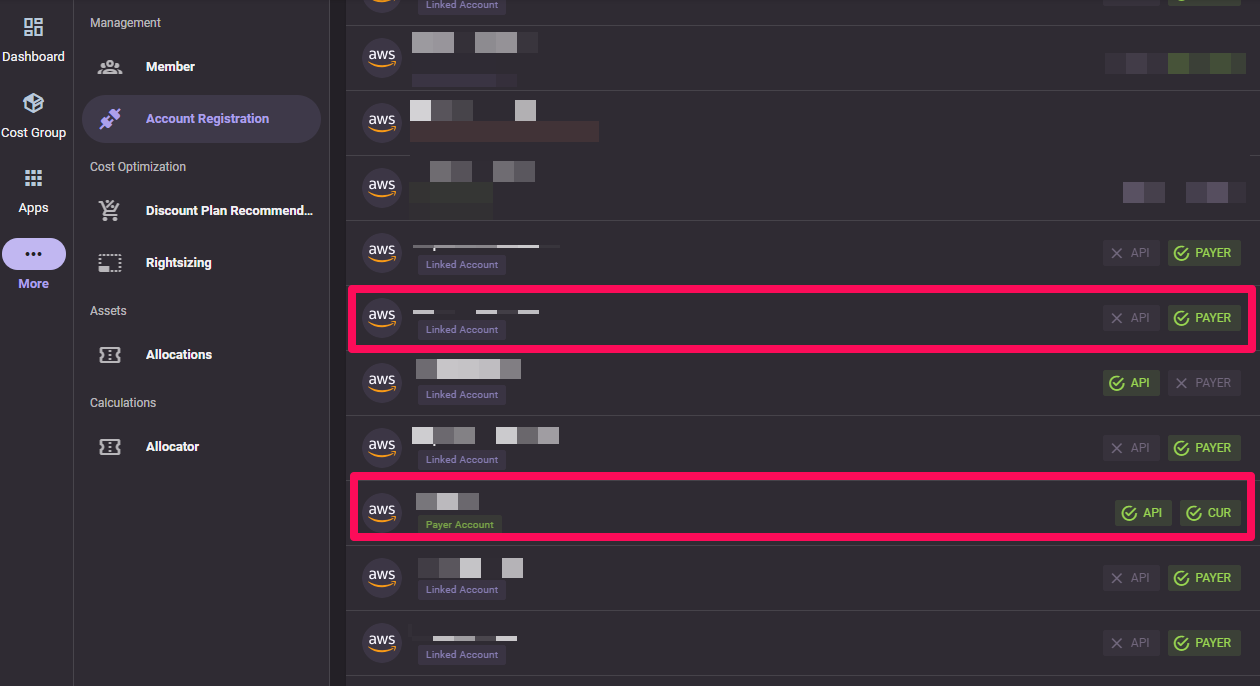
API - API access is established. Applicable to Payer and Linked accounts.
PAYER - Payer account is set on the linked account. This is only applicable to linked accounts since payer accounts automatically sets itself as the payer account.
CUR - CUR and S3 bucket setup is successfuly setup. Applicable to payer accounts only.
Edit Account Details
If there are changes on the setup of your CSP account, Octo provides a setting to update the details.Edit Account Name
Account names can be changed any time. These are used to easily manage the accounts.
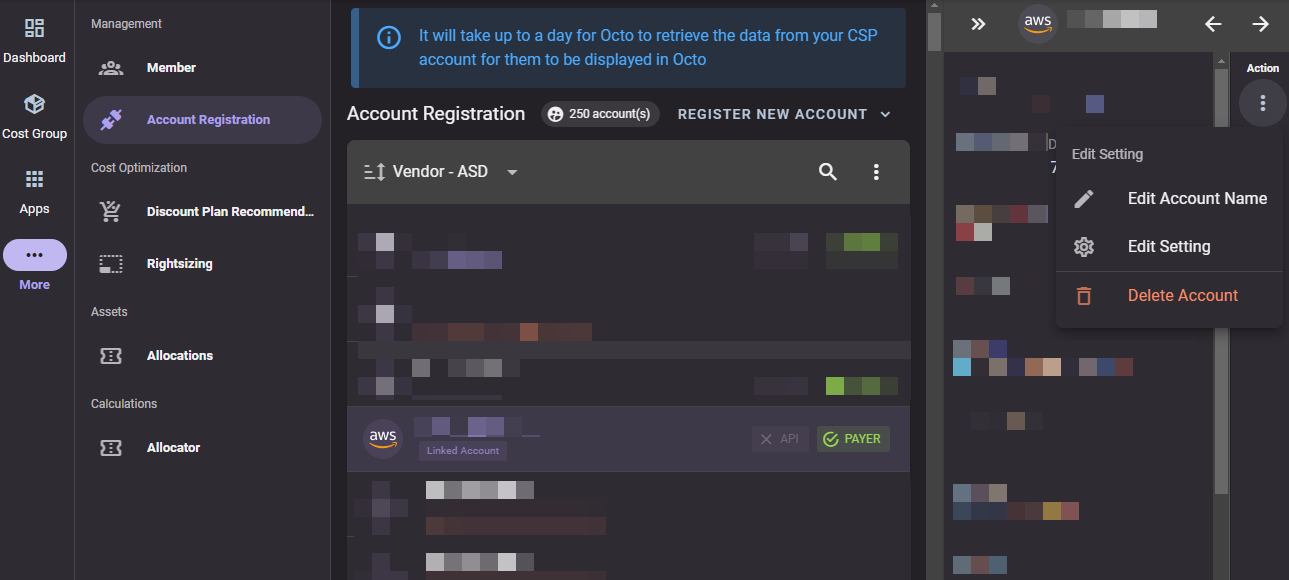
Edit Setting
Edit setting enables the user to update the account settings.
For linked accounts, API access and payer setting can be done.
For payer accounts, API access and setting up the CUR and S3 bucket are applicable.
Delete Account
Delete account removes the account from our database.