Cost Groups
Overview
A Cost Group in OCTO is a powerful feature that provides a customized view of your cloud costs and usage. They are essentially filters that allow you to break down your cloud expenses according to various dimensions, offering a granular perspective on your spending.
-
What are Cost Groups?
Cost Groups in OCTO are groupings that can be defined based on specific criteria. They allow you to analyze and manage your cloud costs and usage in a way that aligns with your business needs and structure. Whether it's by cloud provider accounts, services, regions, or tags, cost groups help you understand where your money is going and how resources are being utilized.
-
Detailed Analysis
Cost Groups offer the flexibility to view your cloud costs and usage across a multitude of dimensions, such as specific cloud provider accounts, services, regions, or tags. This allows you to 'slice and dice' your costs, providing a granular analysis of your cloud spending. It helps you uncover hidden costs, identify trends, or spot inefficiencies, thus contributing to a more comprehensive cloud cost management strategy and in-depth analysis of your cloud spending.
Please note that this feature is only available to Admins in your OCTO organization. This is to ensure that cost data and financial information is managed and viewed by authorized personnel only, thus maintaining data integrity and security within your organization.
In conclusion, cost groups in OCTO are a flexible and powerful tool designed to help you better understand and manage your cloud costs. By providing the ability to visualize and customize your cost analysis, cost groups empower you to make more informed decisions about your cloud expenditure. Cost Groups is a key feature in OCTO as discussed in this article. This time, we will tackle how to manage your cost groups efficiently. We shall cover how to create, edit, remove, and view cost groups.
Only Admin accounts can create, edit, and remove cost groups.
Creating a Cost Group
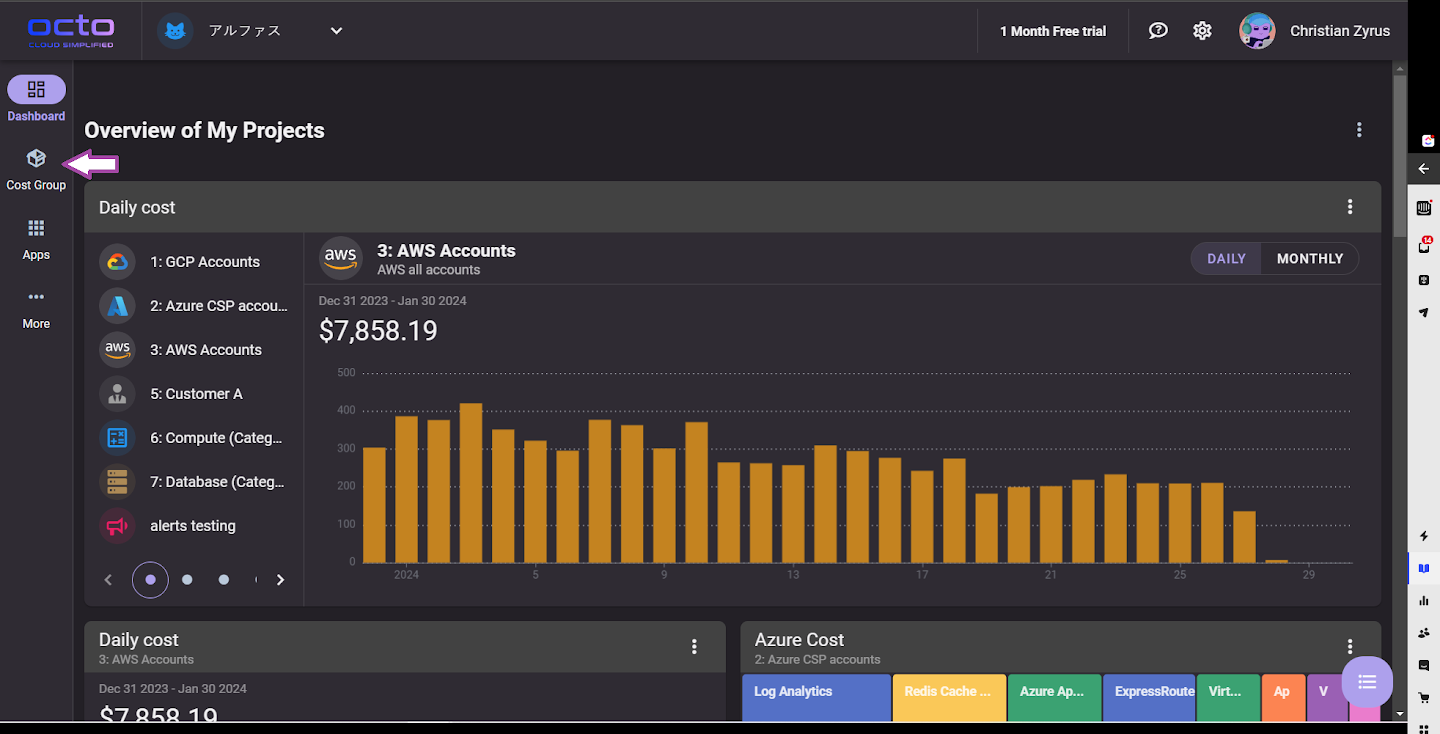
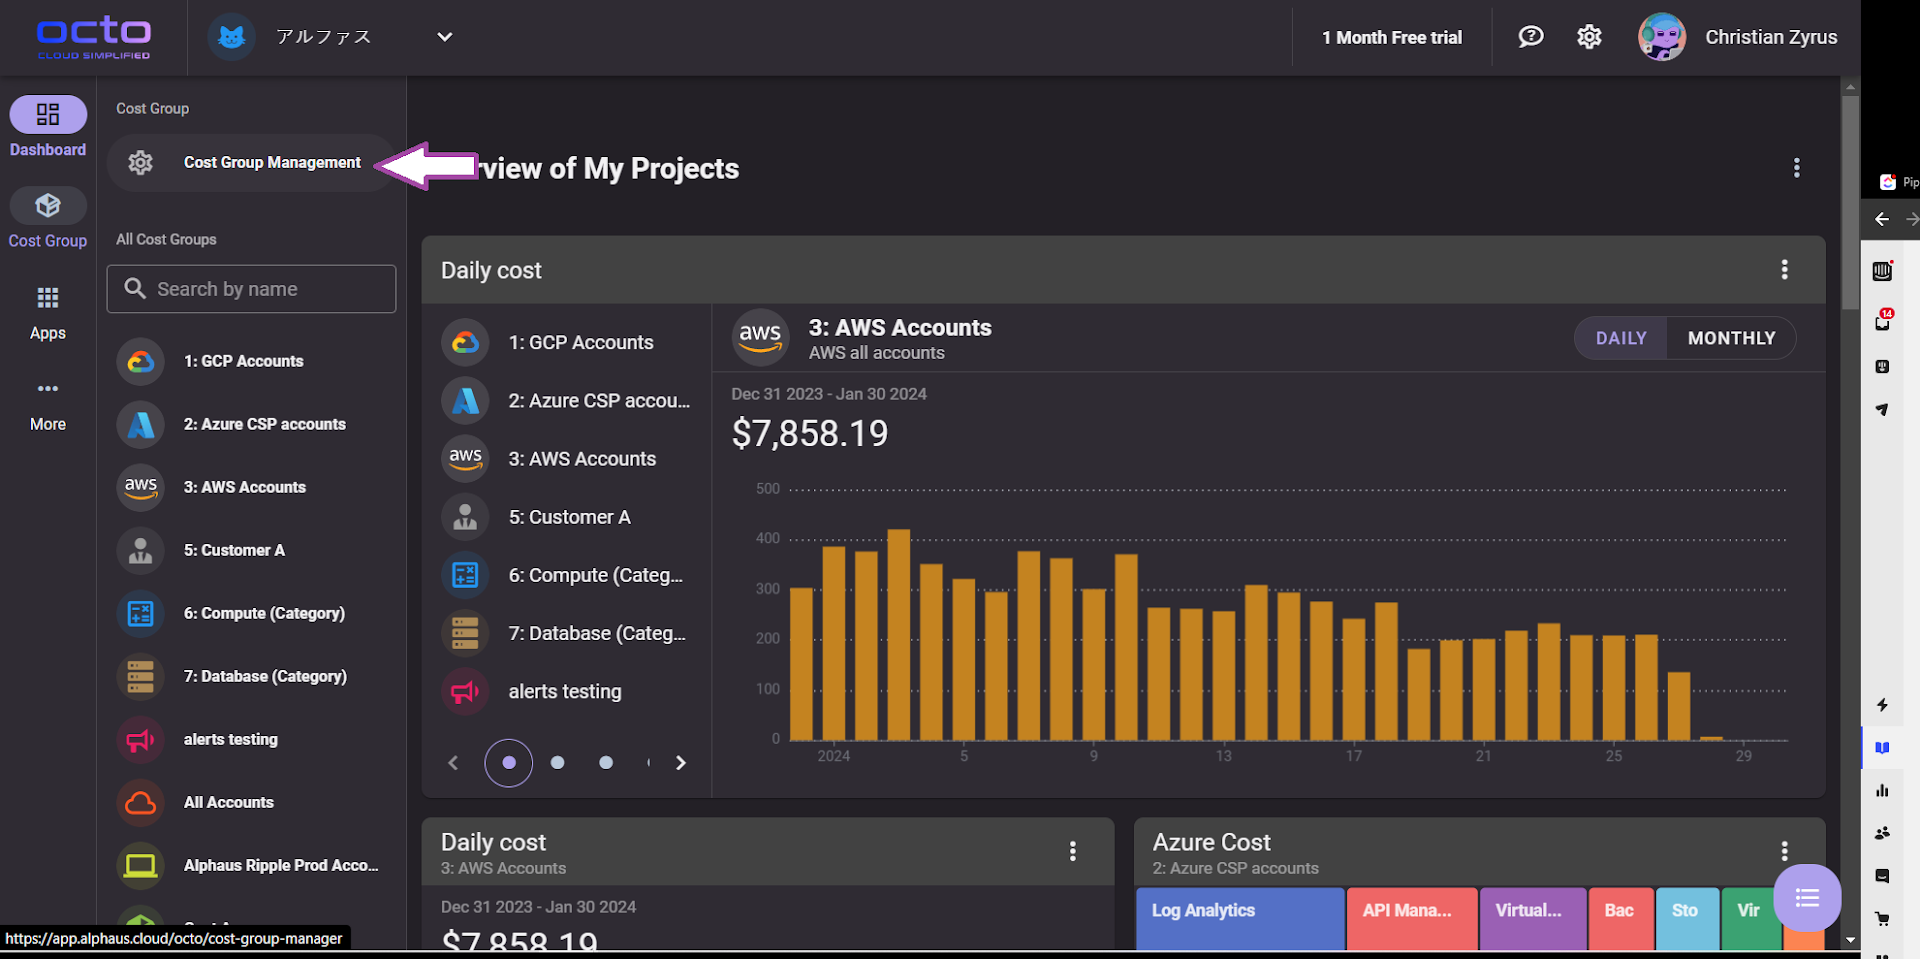
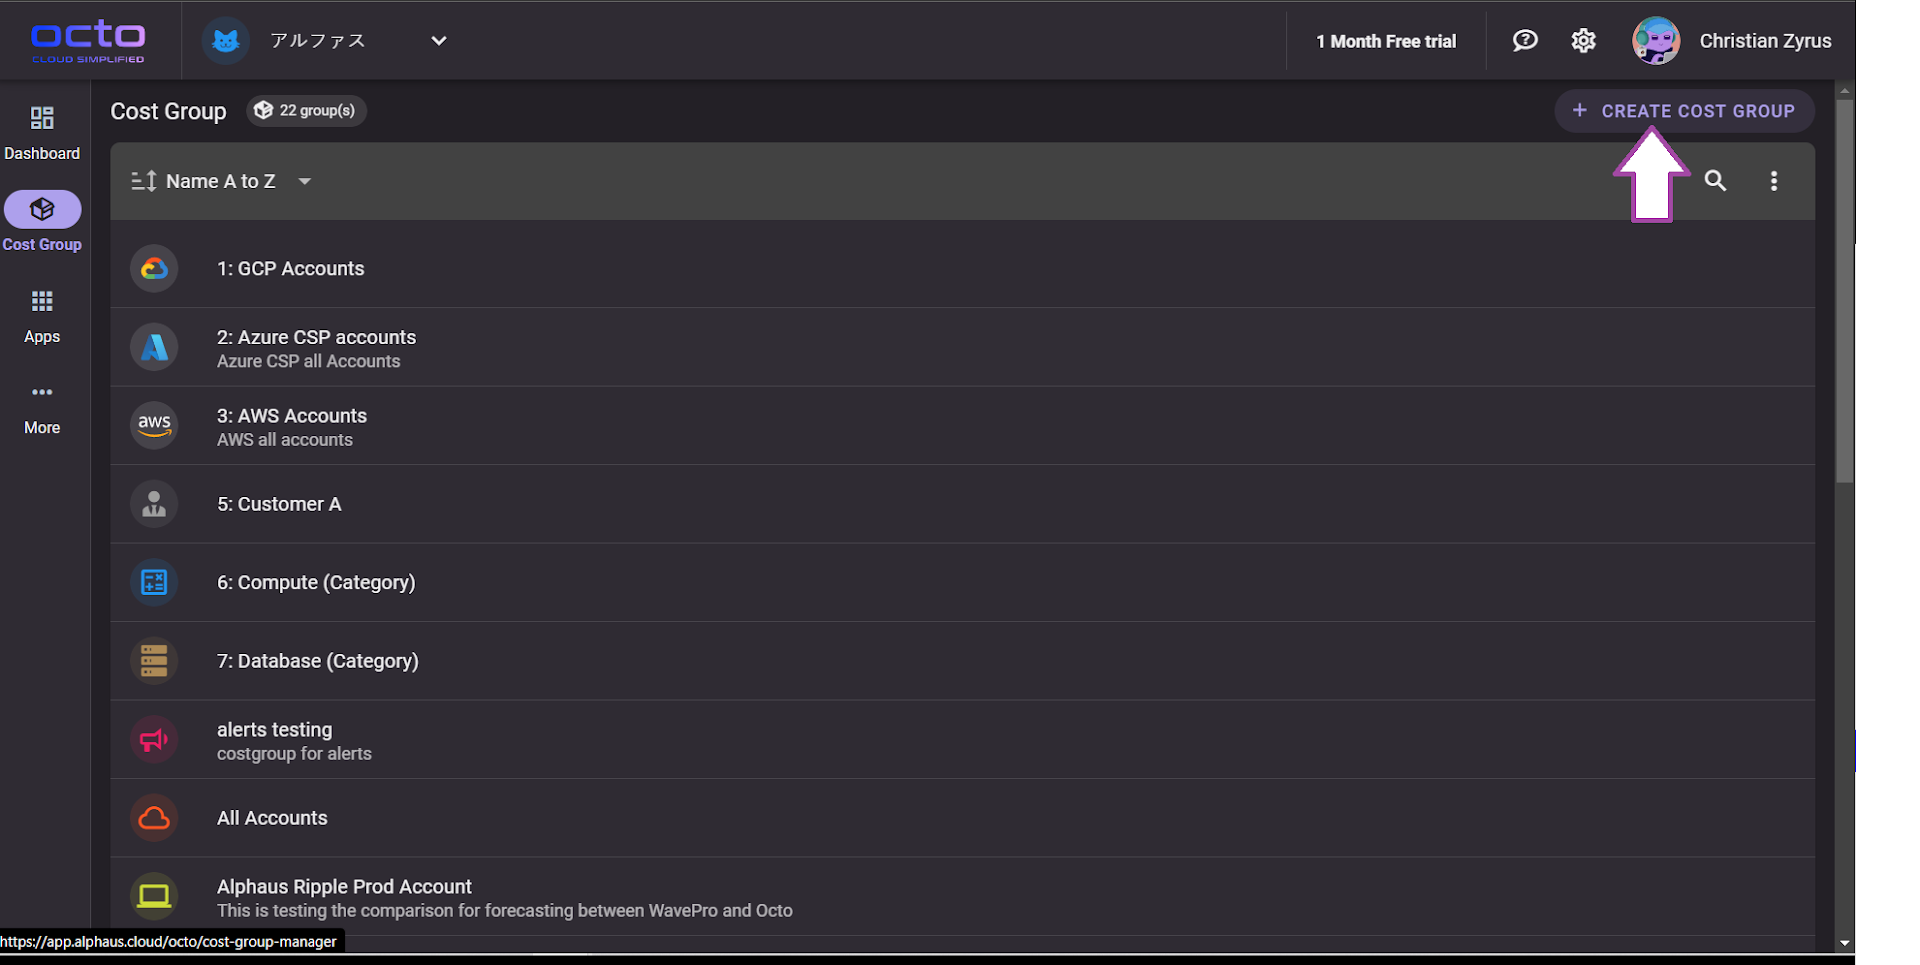
Head to the left side panel section and select 'Cost Group'. Click the '+ CREATE COST GROUP' button and supply basic information such as cost group name and description. You might as well change the avatar and color to your liking. Then create combinations.
-
Click Cost Group
-
Click Cost Group Management
-
Click '+ CREATE COST GROUP'
-
Fill CostGroup Details. You might as well change the avatar and color to your liking.

Combinations in Cost Groups and How to Use Them
What are combinations and what is its role in creating cost groups? In this article, we shall discuss all about combinations: what it is, how to create one, its benefits, and how to work with them.
With the rise of cloud computing came the rise of cloud cost management problems. Different services from different providers are utilized. As the demand for cloud resources increases, companies struggle to manage their cost which leads to unoptimized usage. All that hot mess of cloud resource tracking from different providers can take a toll on a day-to-day basis as it consumes time and effort. OCTO solves all that.
To create a Cost Group means we need to deal with combinations. So, what are combinations? Combinations is the building block of Cost Groups. A combination enables the user to customize which accounts or services belong to a certain cost group. Users can combine different accounts from different providers as well as different services, regions, or tags. A filter in its simplest explanation.
### Creating Combinations Make sure you are using an admin account. In the Cost Group tab, click “Create New Cost Group” button. Supply the cost group name and its description. You might as well change the avatar and color to your liking.
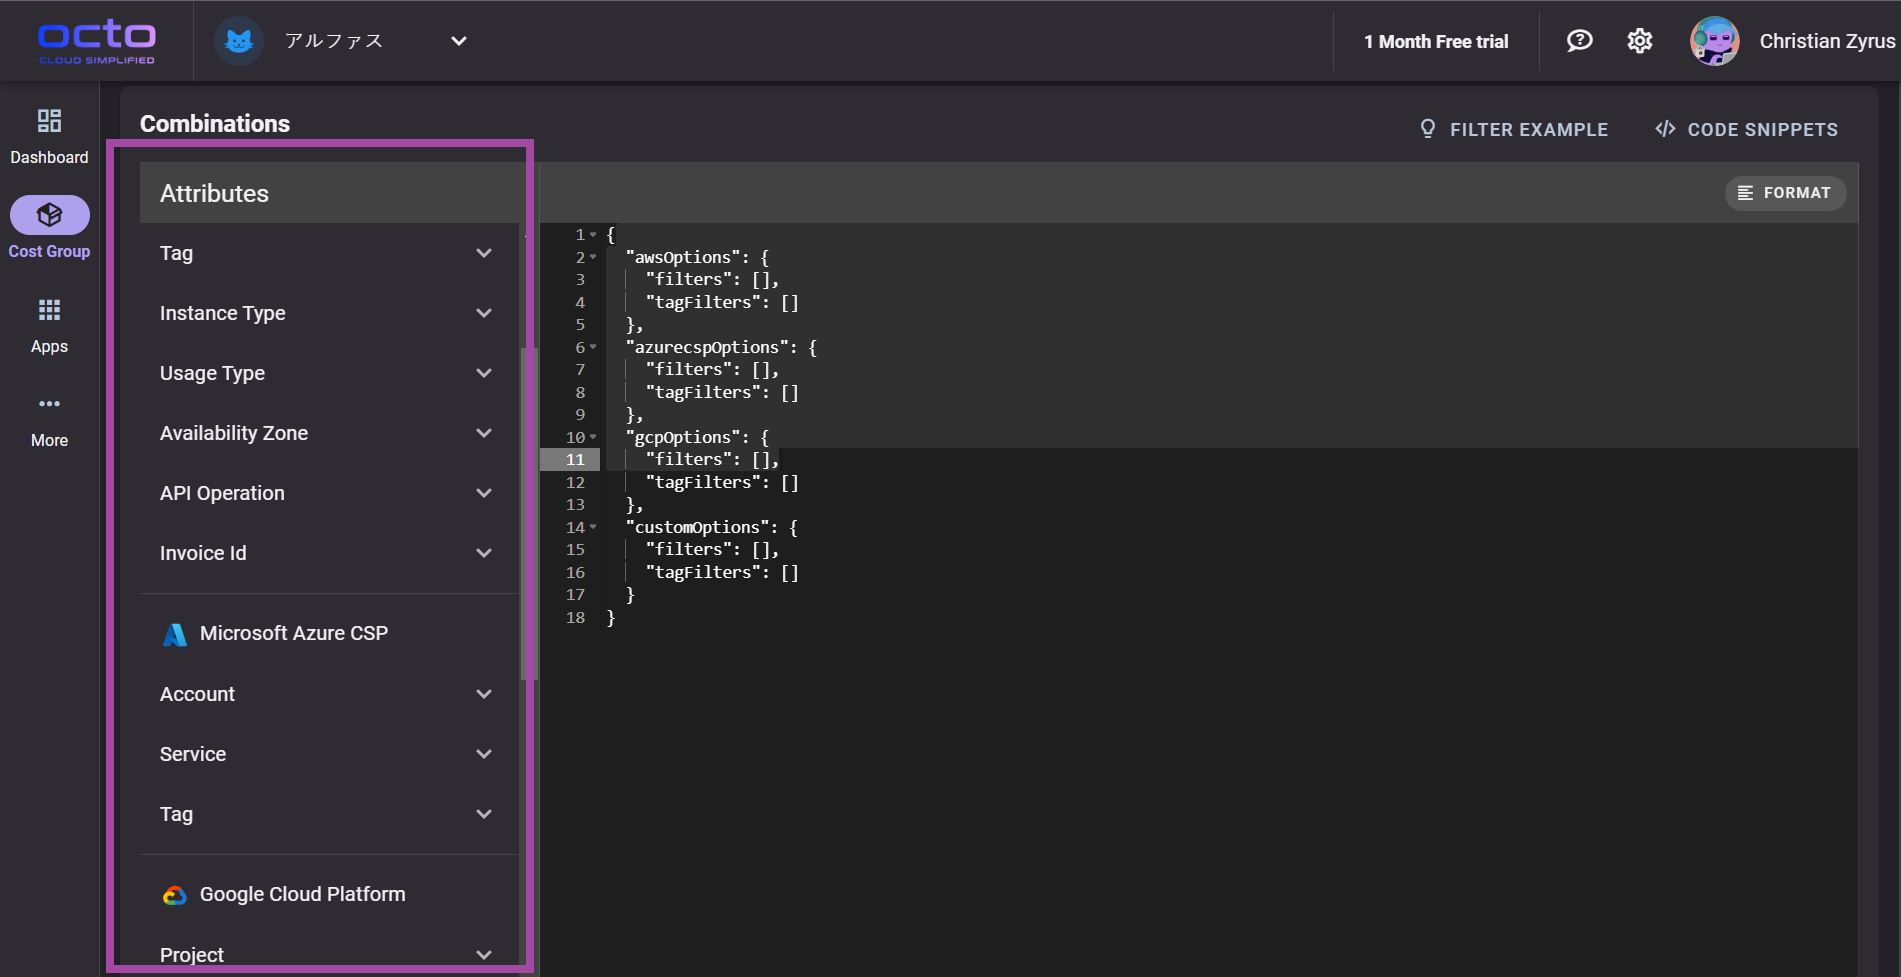
In the highlighted section of the left panel, within the attributes section, there is a combination of vendor, categories, and attributes. Currently, we offer support for vendors such as AWS, Azure, and GCP. Regarding categories, you can choose from options like account, product, region, tag, and more. The chosen category determines which resources will be included in the cost group. To refine your selection, you can further specify a subject, opting for all or selecting from the available accounts, products, regions, tags, etc., depending on the chosen category and your previously registered accounts.
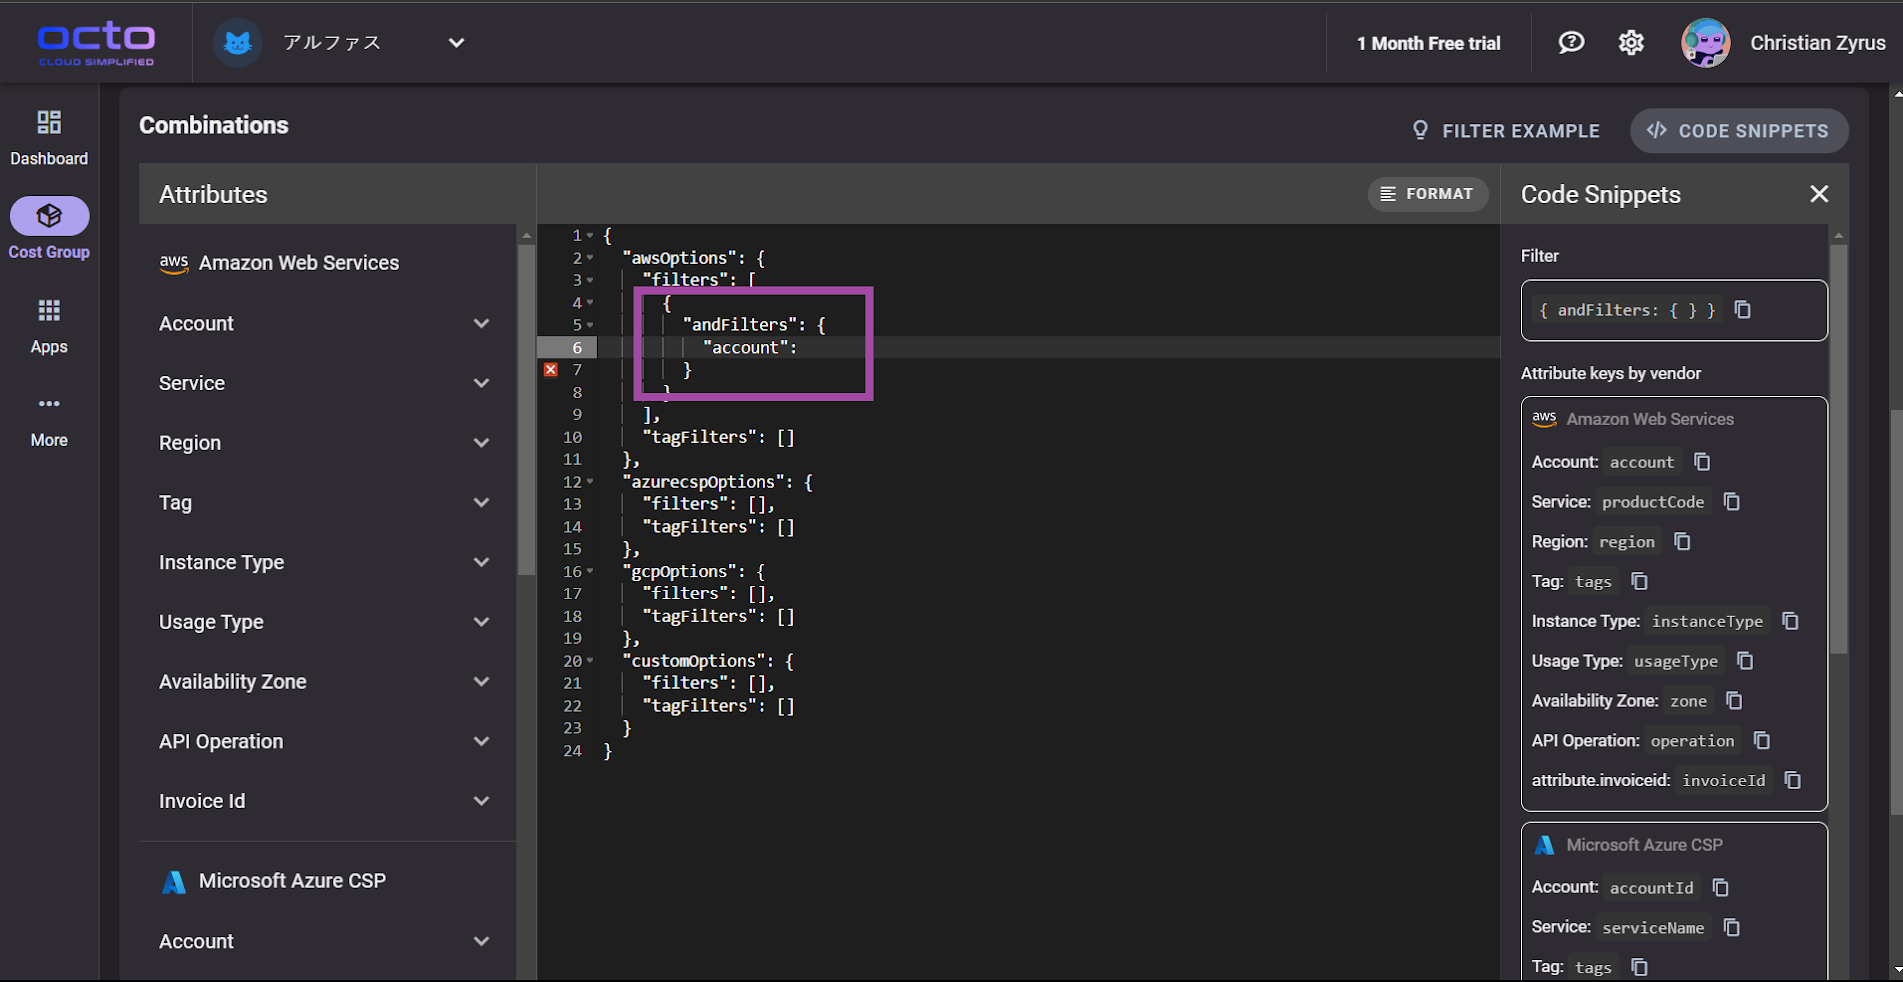
Scenario 1 | The ALL subject. You want to include all your AWS accounts in the cost group.
-
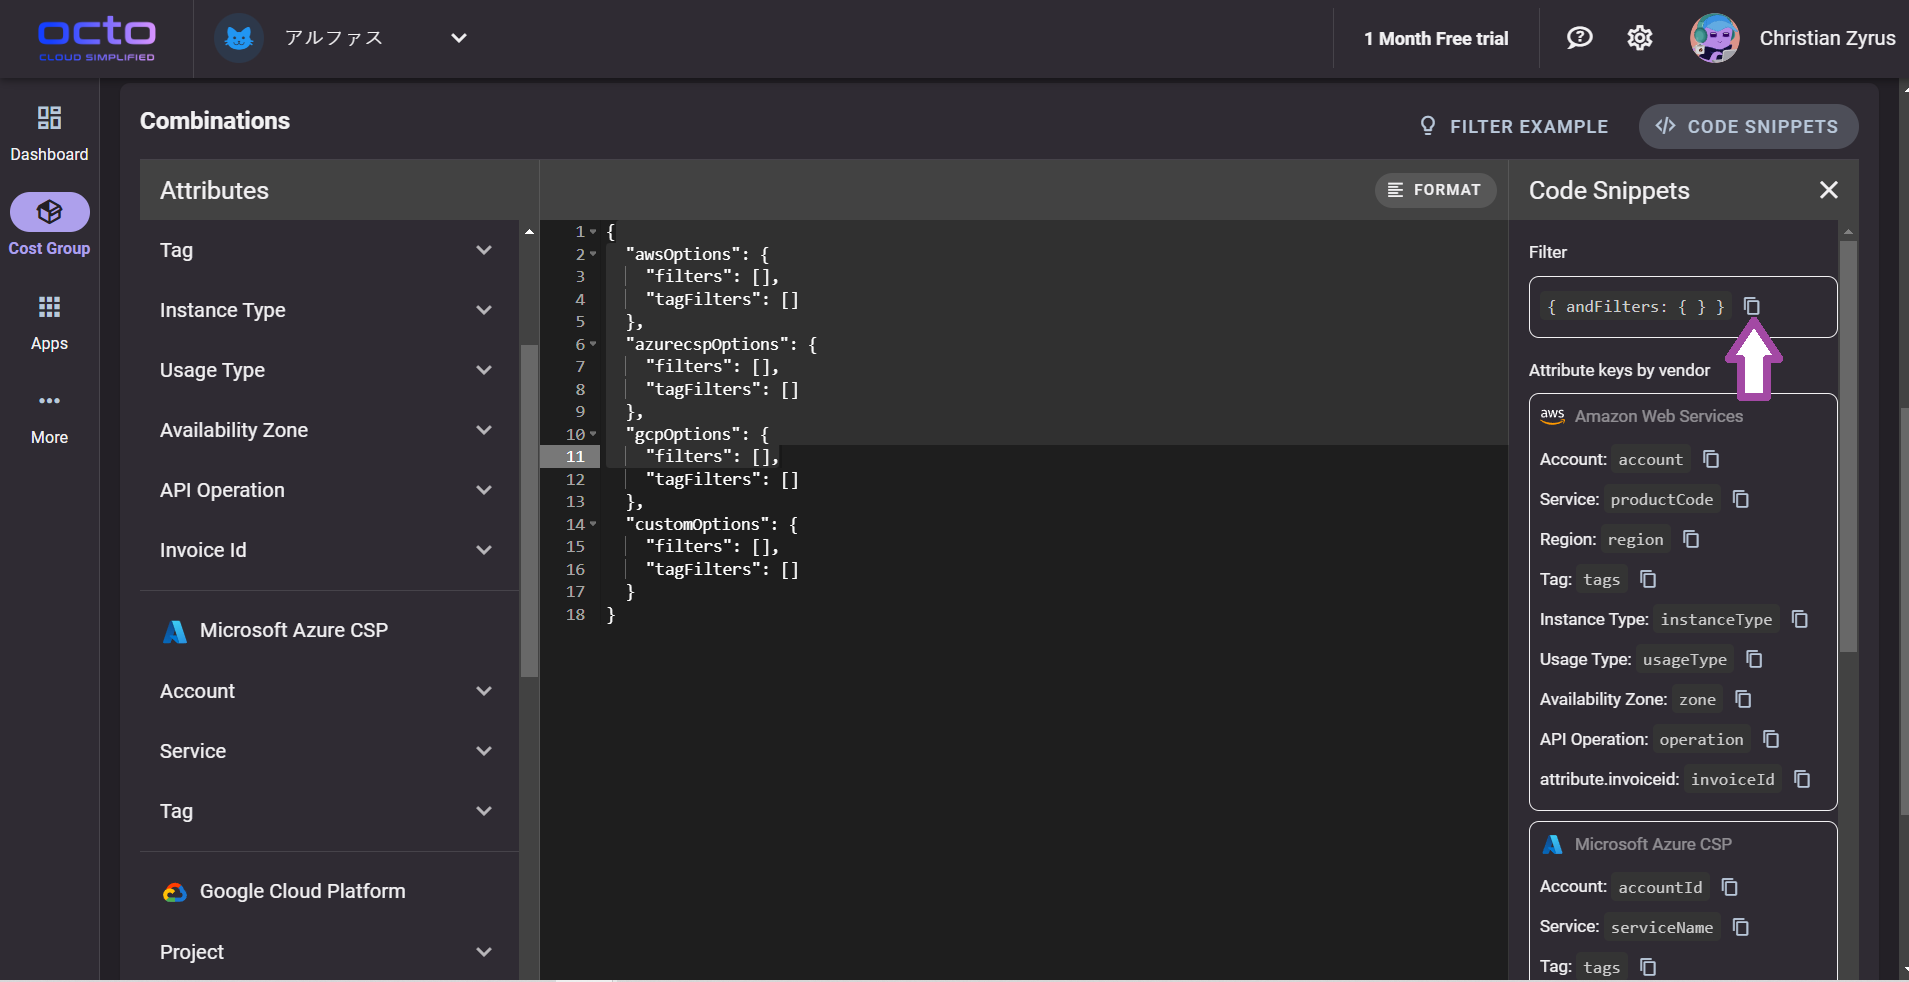
Head to Code Snippets
-
Copy Filter (andFilter)
-
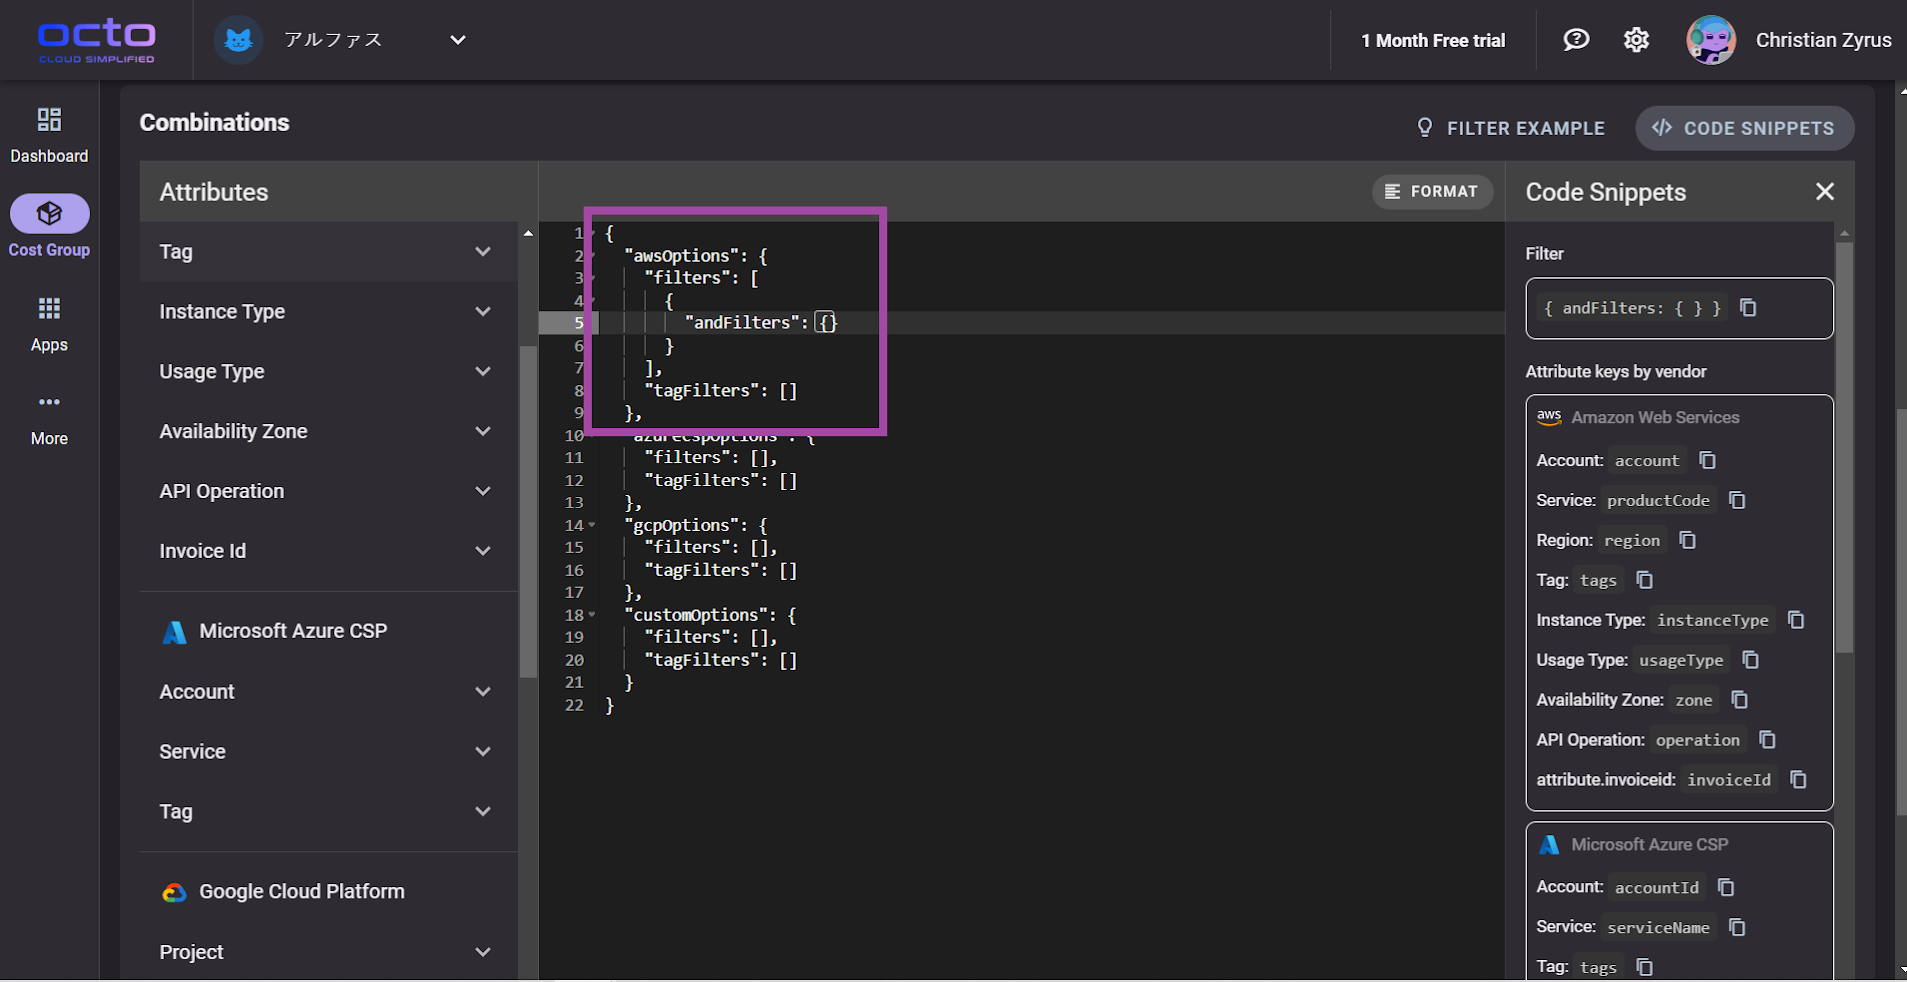
Paste Filter (andFilter) in the combinations under "awsOptions" since we're grouping all AWS accounts.
-
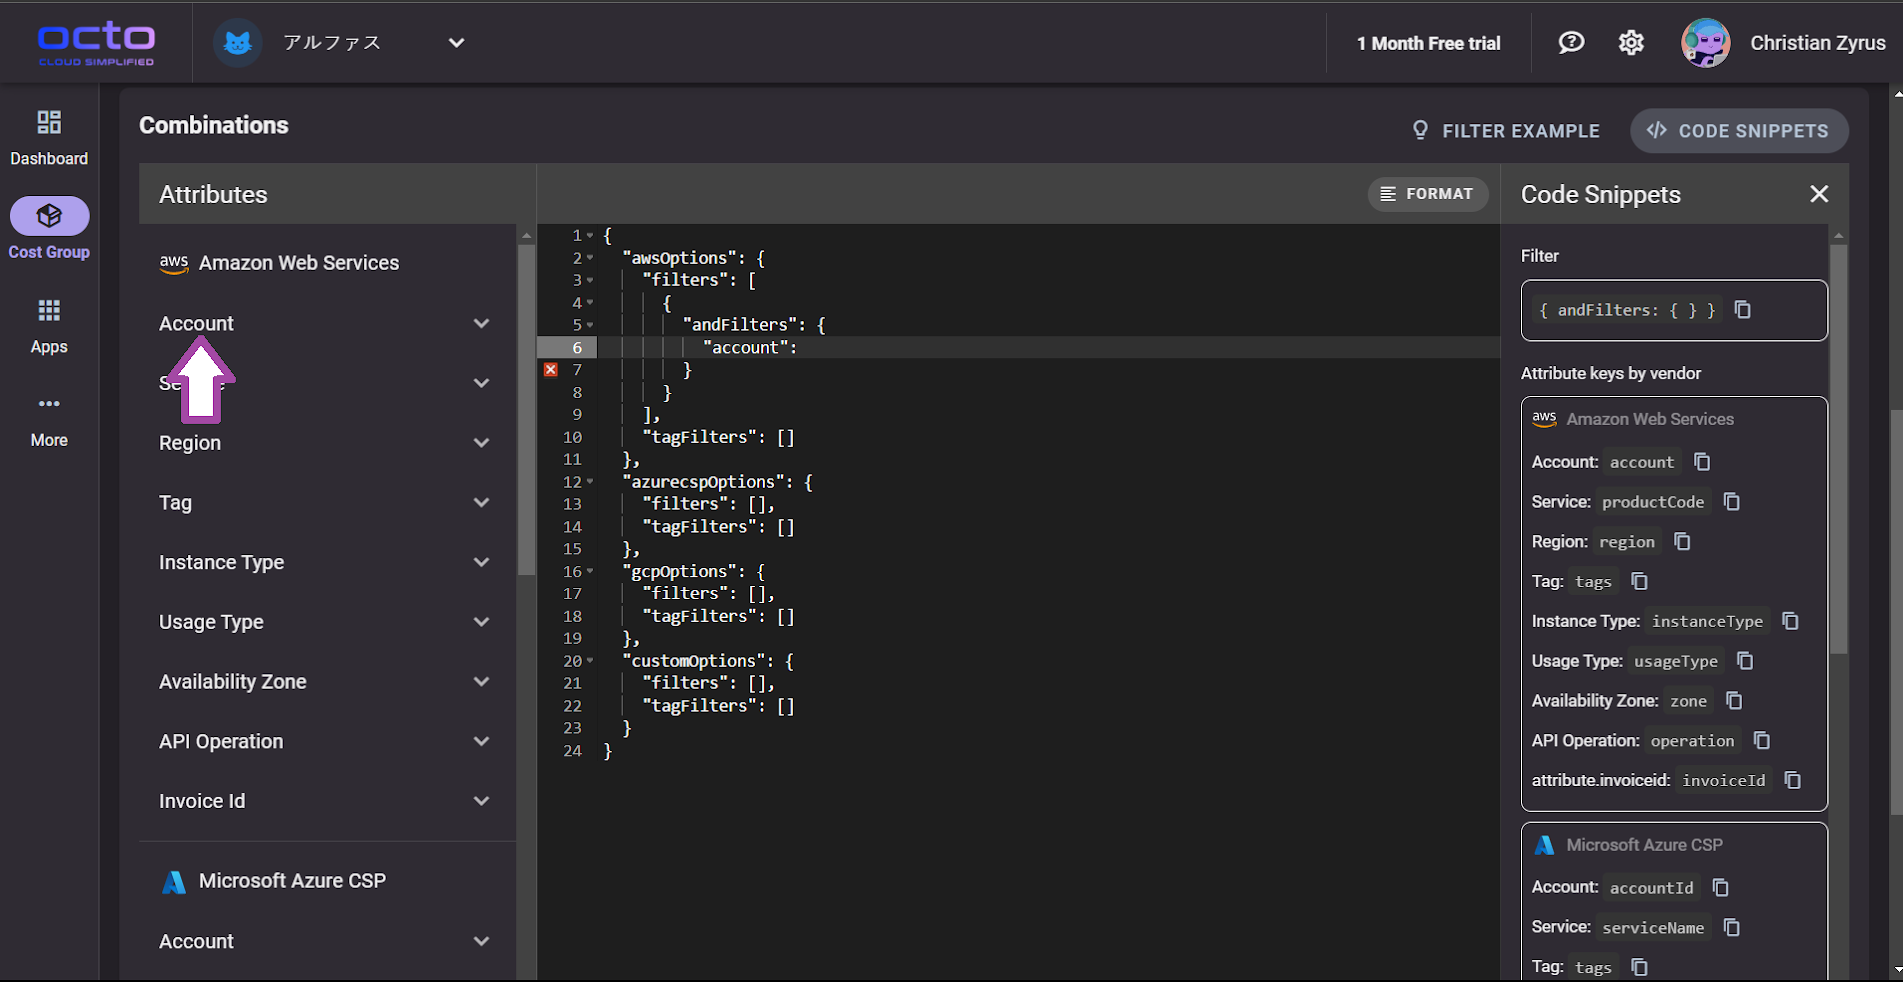
Head back to code snippets and copy the account category and paste it inside the "andFilter".
-
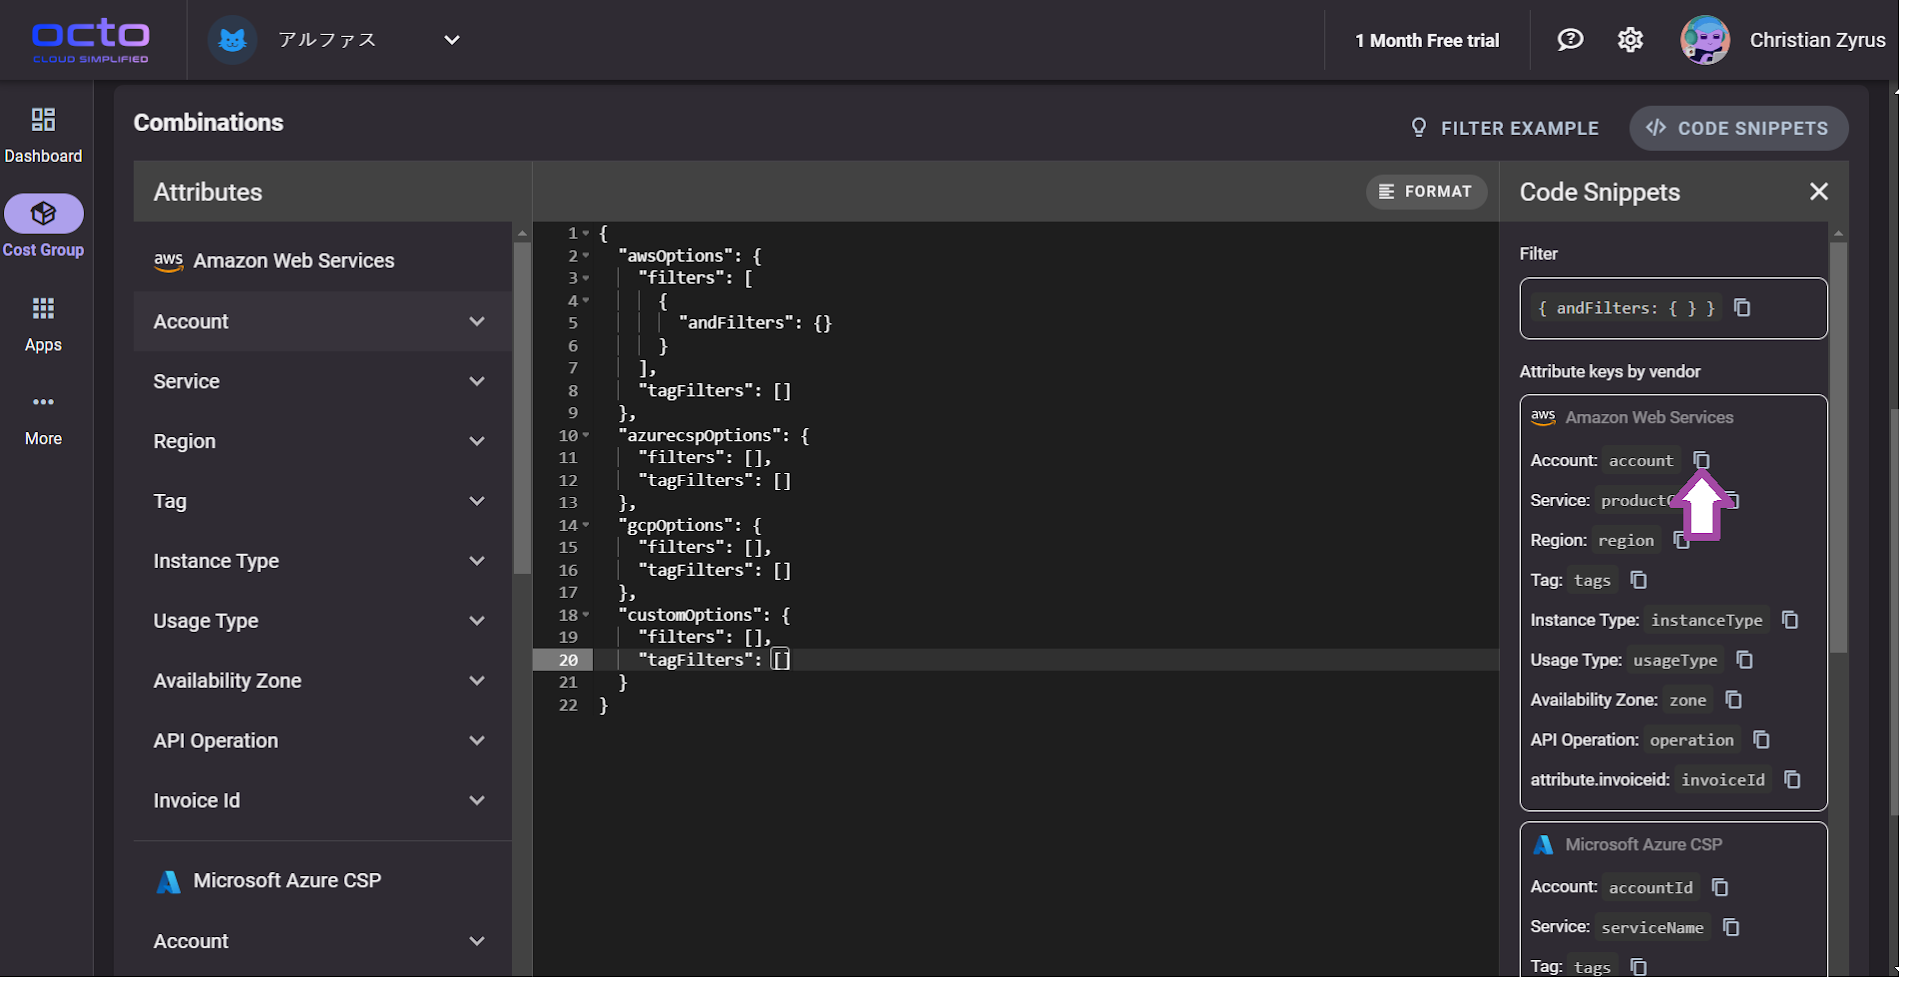
Now add a value "*" which indicates that your are selecting all accounts associated with a vendor, specifically AWS, in this context.
-
Now click "Create Cost Group"
-
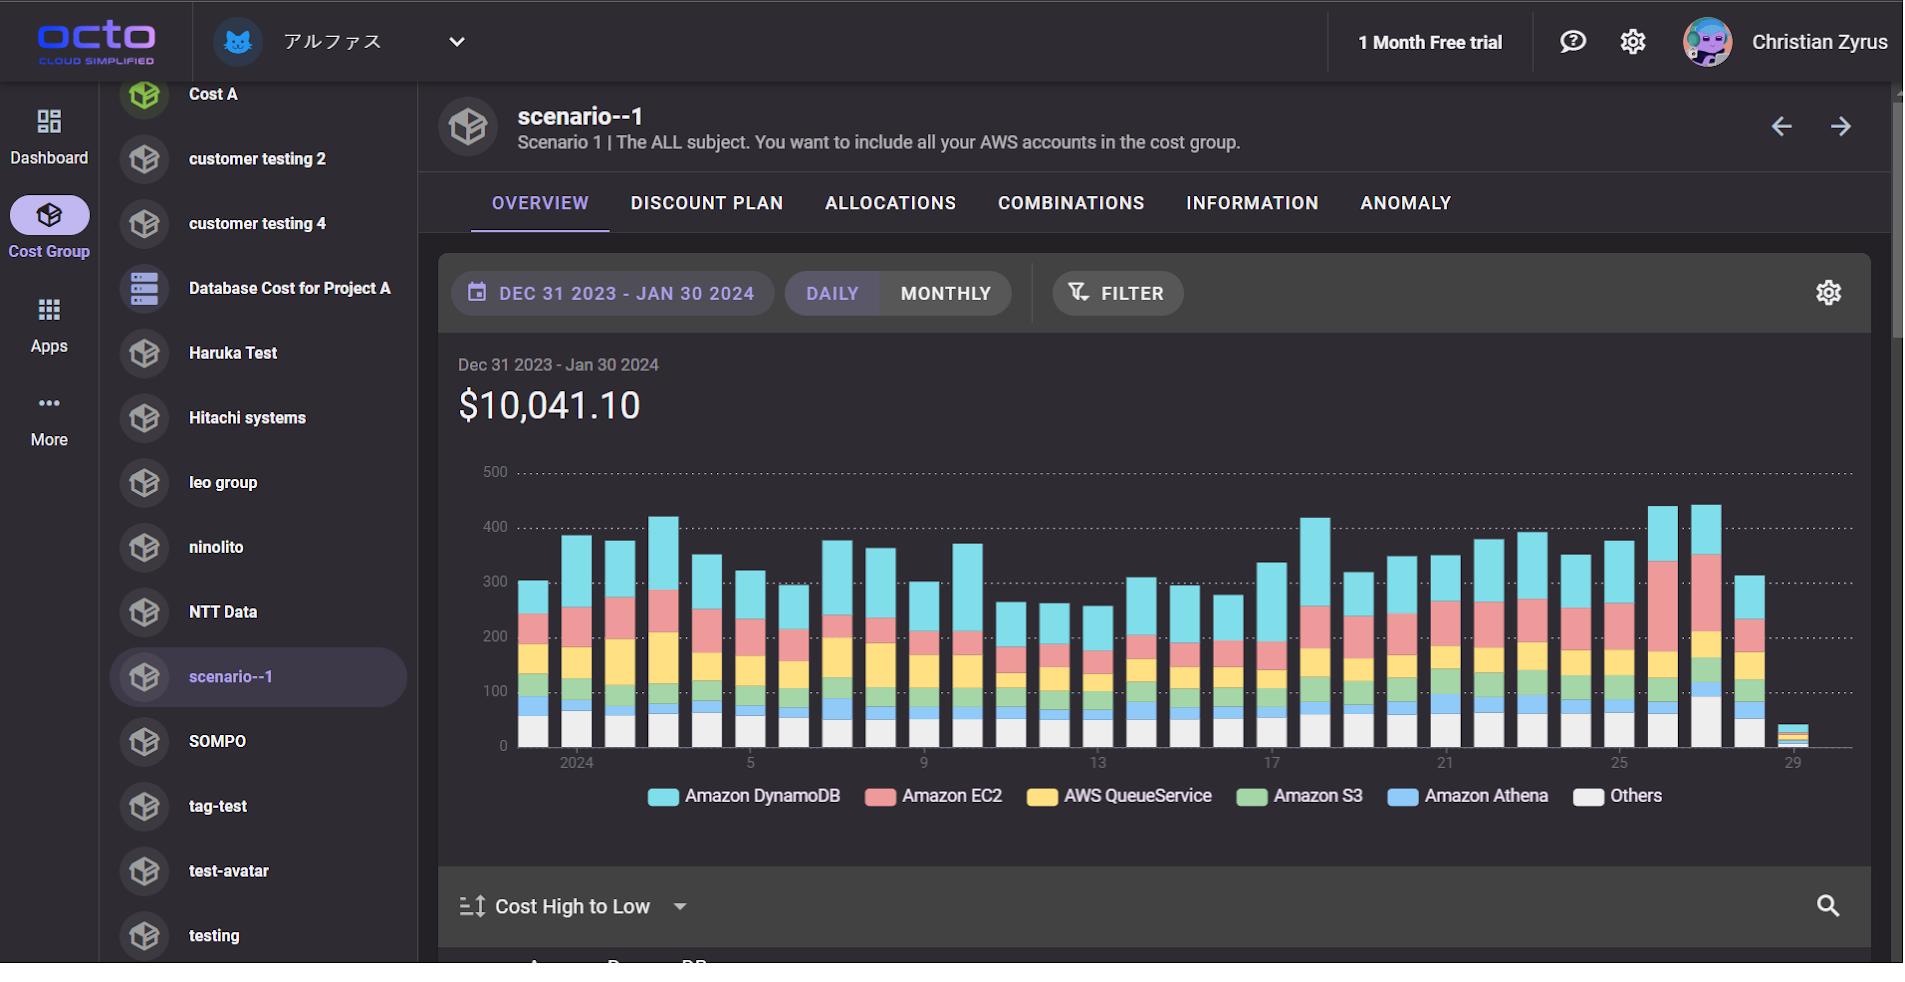
Now you are done creating your costgroup, you can now view it. Here it is.


Note: This setup also applies to other vendors and categories. You also have the option to incorporate categories from various vendors simultaneously. Simply apply the filter of your choice to each vendor individually.
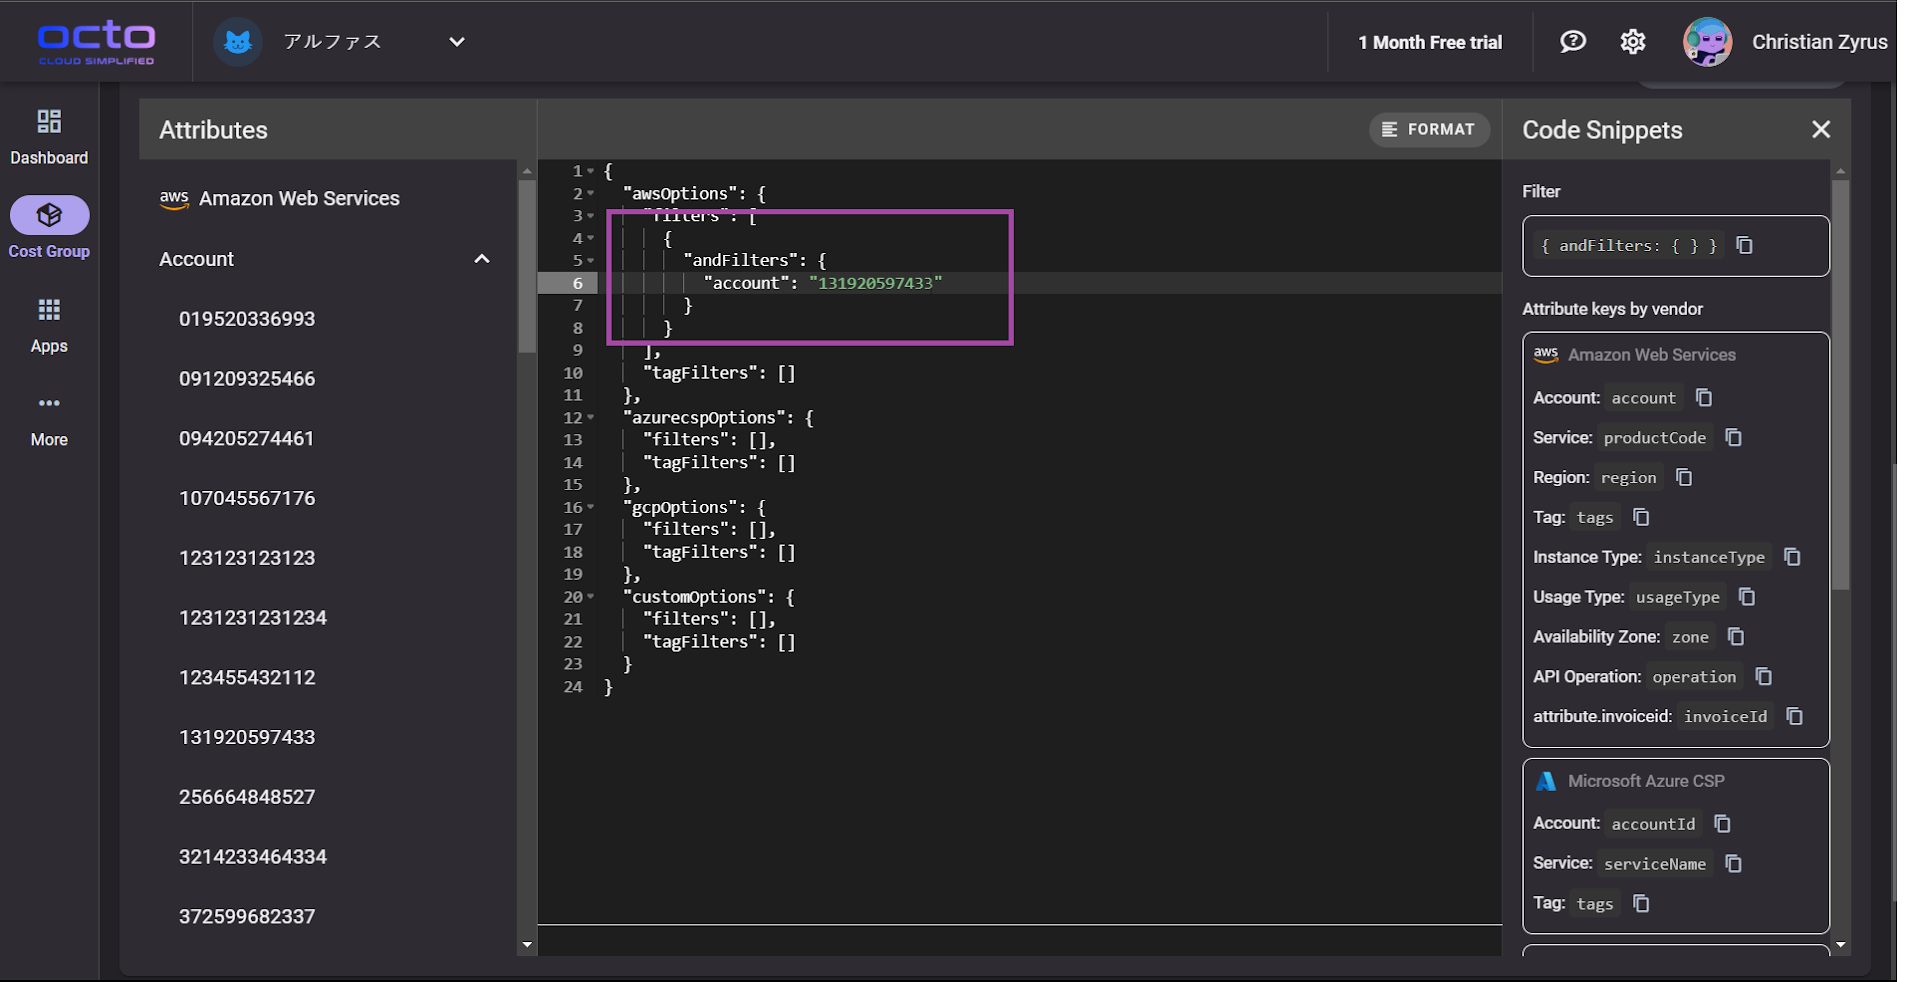
Scenario 2 | Select only specific attribute. You want to select only your specific AWS account in the cost group.
Same setup on scenario-1 except you need to specify the account you want to create as costgroup.
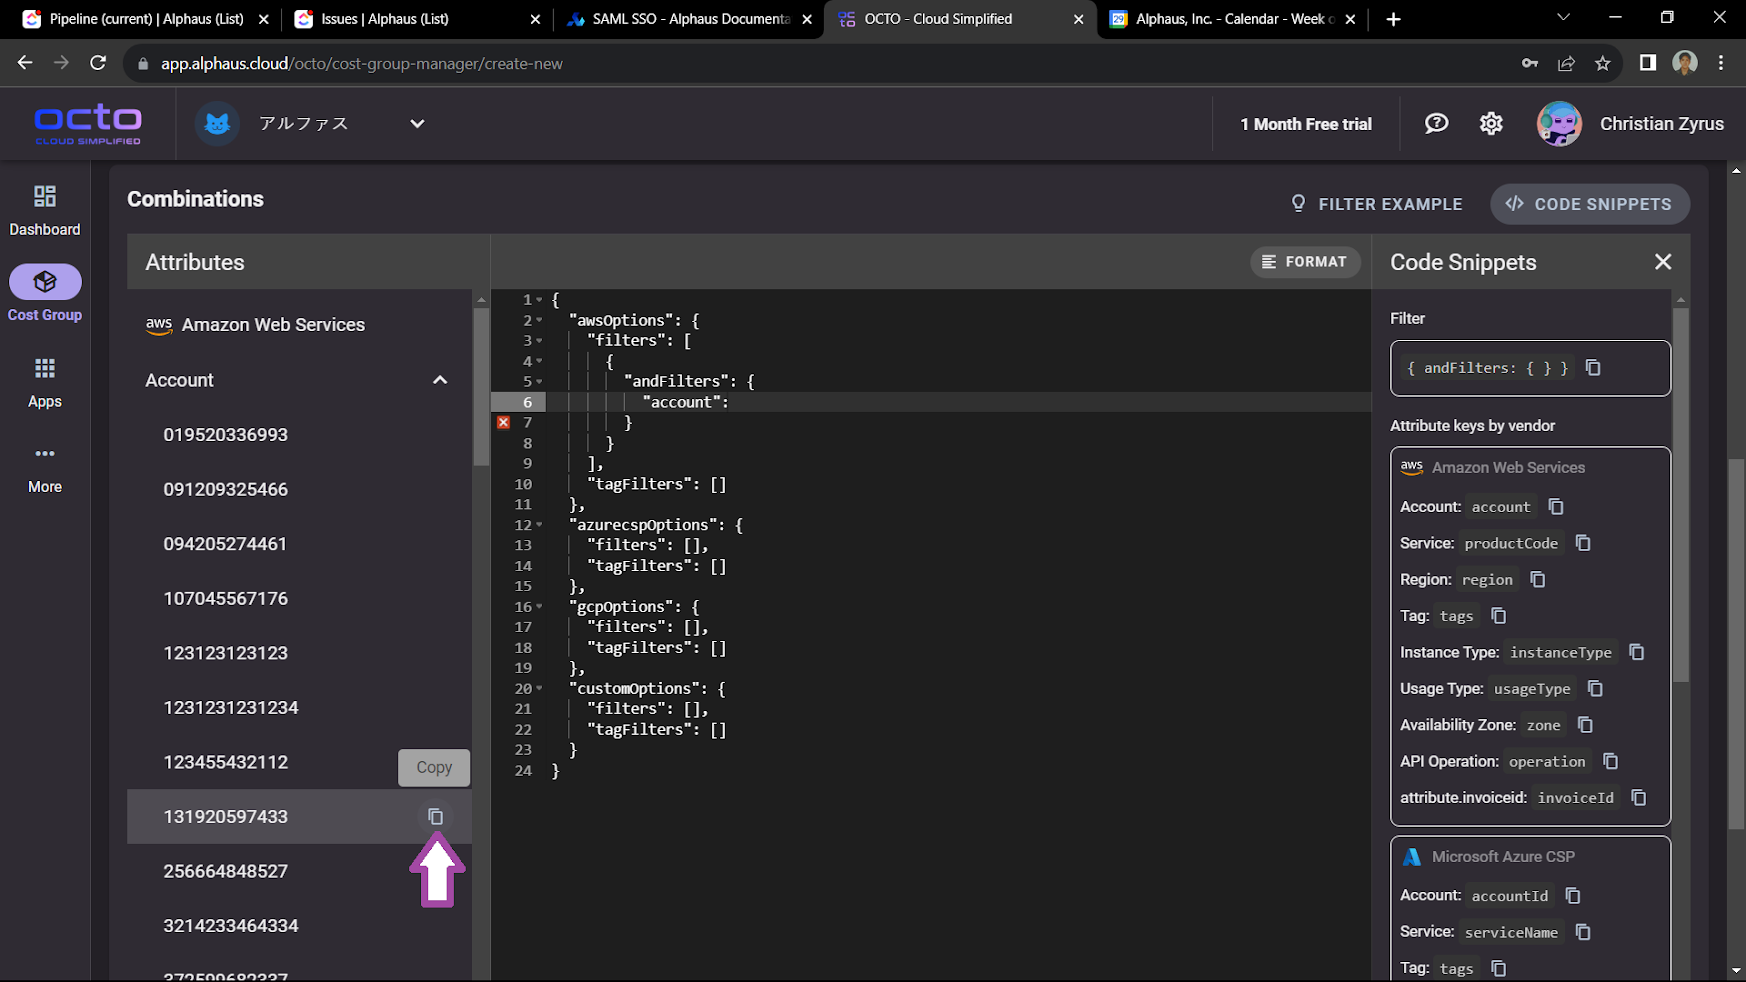
- Head to attributes section and select account category under AWS.
-
Now copy the account of your choice for the cost group.
-
Now paste it as a value of account category.
-
Now it's done, and click the create cost group button. You can now view it in Cost Groups.
Note: This setup also applies to other vendors and categories. You also have the option to incorporate categories from various vendors simultaneously. Simply apply the filter of your choice to each vendor individually.
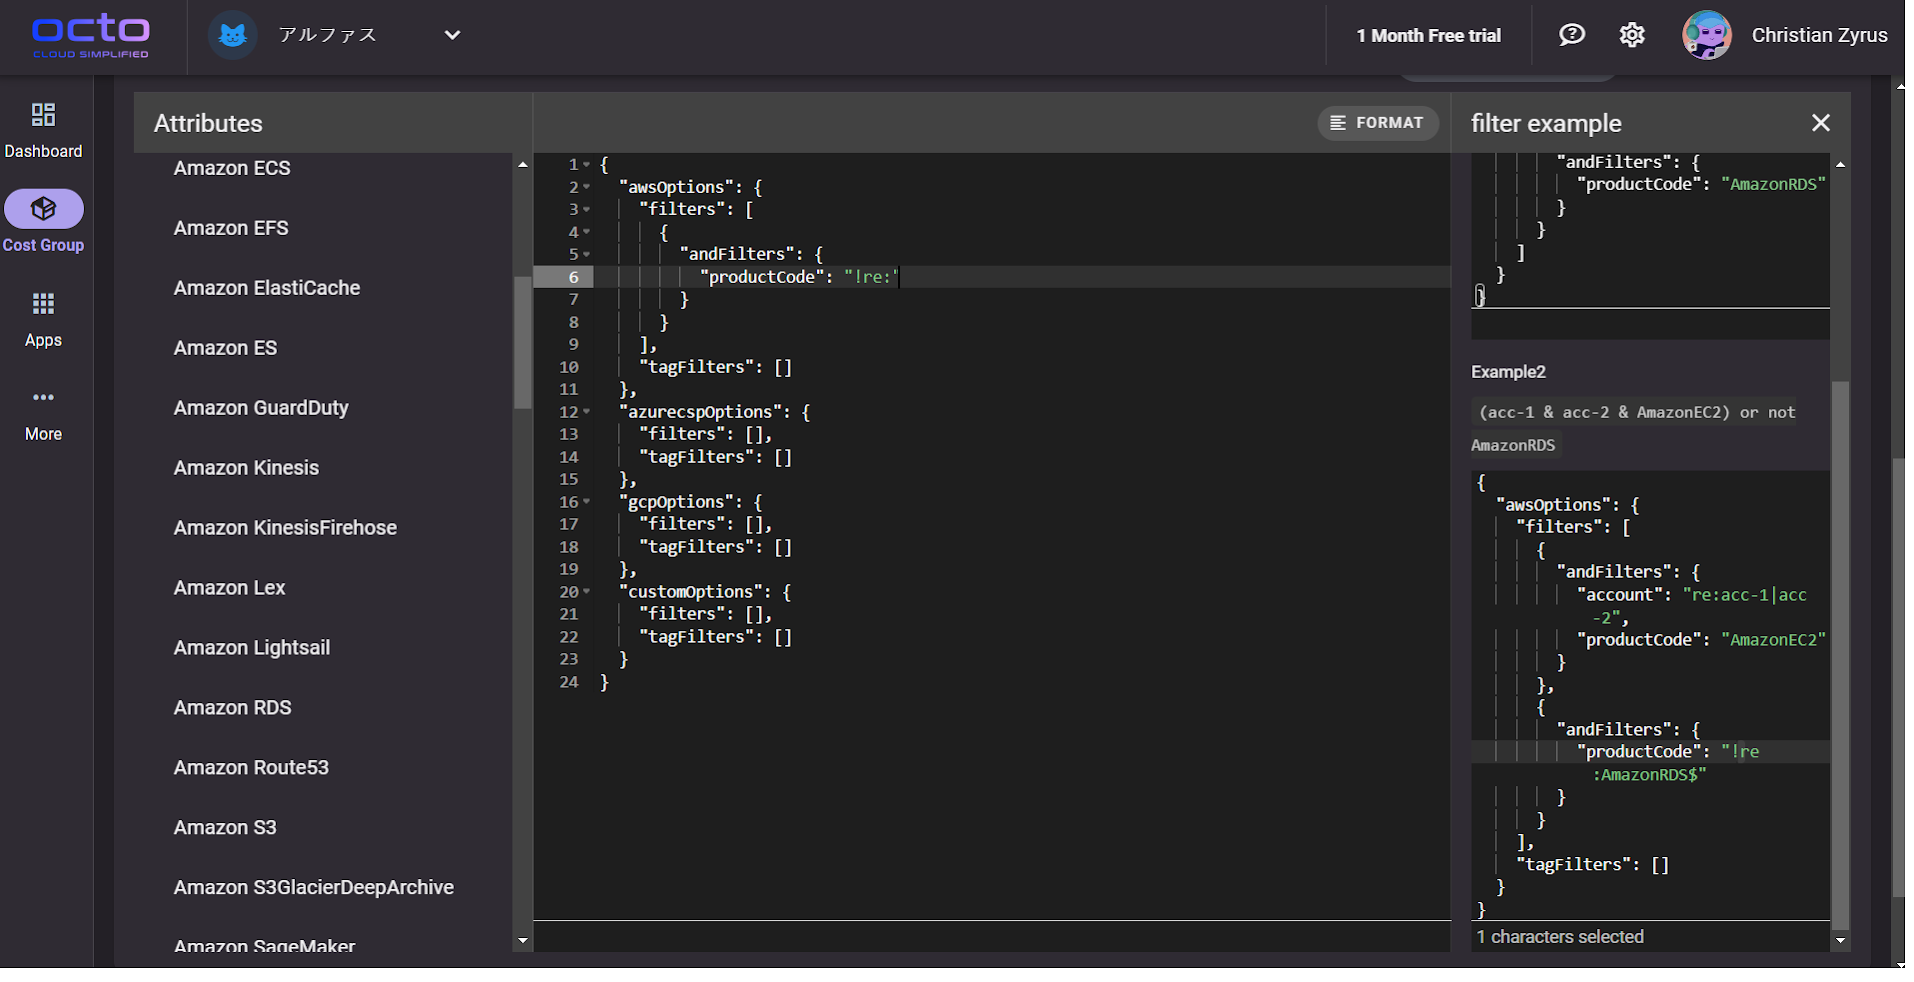
Scenario 3 | The IS NOT comparison. You want to include all AWS services in your cost group excluding S3.
Same setup on previous scenarios except you need to specify the product/service you want exclude to create as costgroup.
-
After you setup filter, now copy the productCode category from code snippet or simply type it.
-
Now add "!re:" as a value on productCode. This indicates as "is not".
-
Head to attributes section and select service category under AWS and copy "AmazonS3".


-Now it's done, and click the creat cost group button. You can now view it in Cost Groups.
Note: This setup also applies to other vendors and categories. You also have the option to incorporate categories from various vendors simultaneously. Simply apply the filter of your choice to each vendor individually.
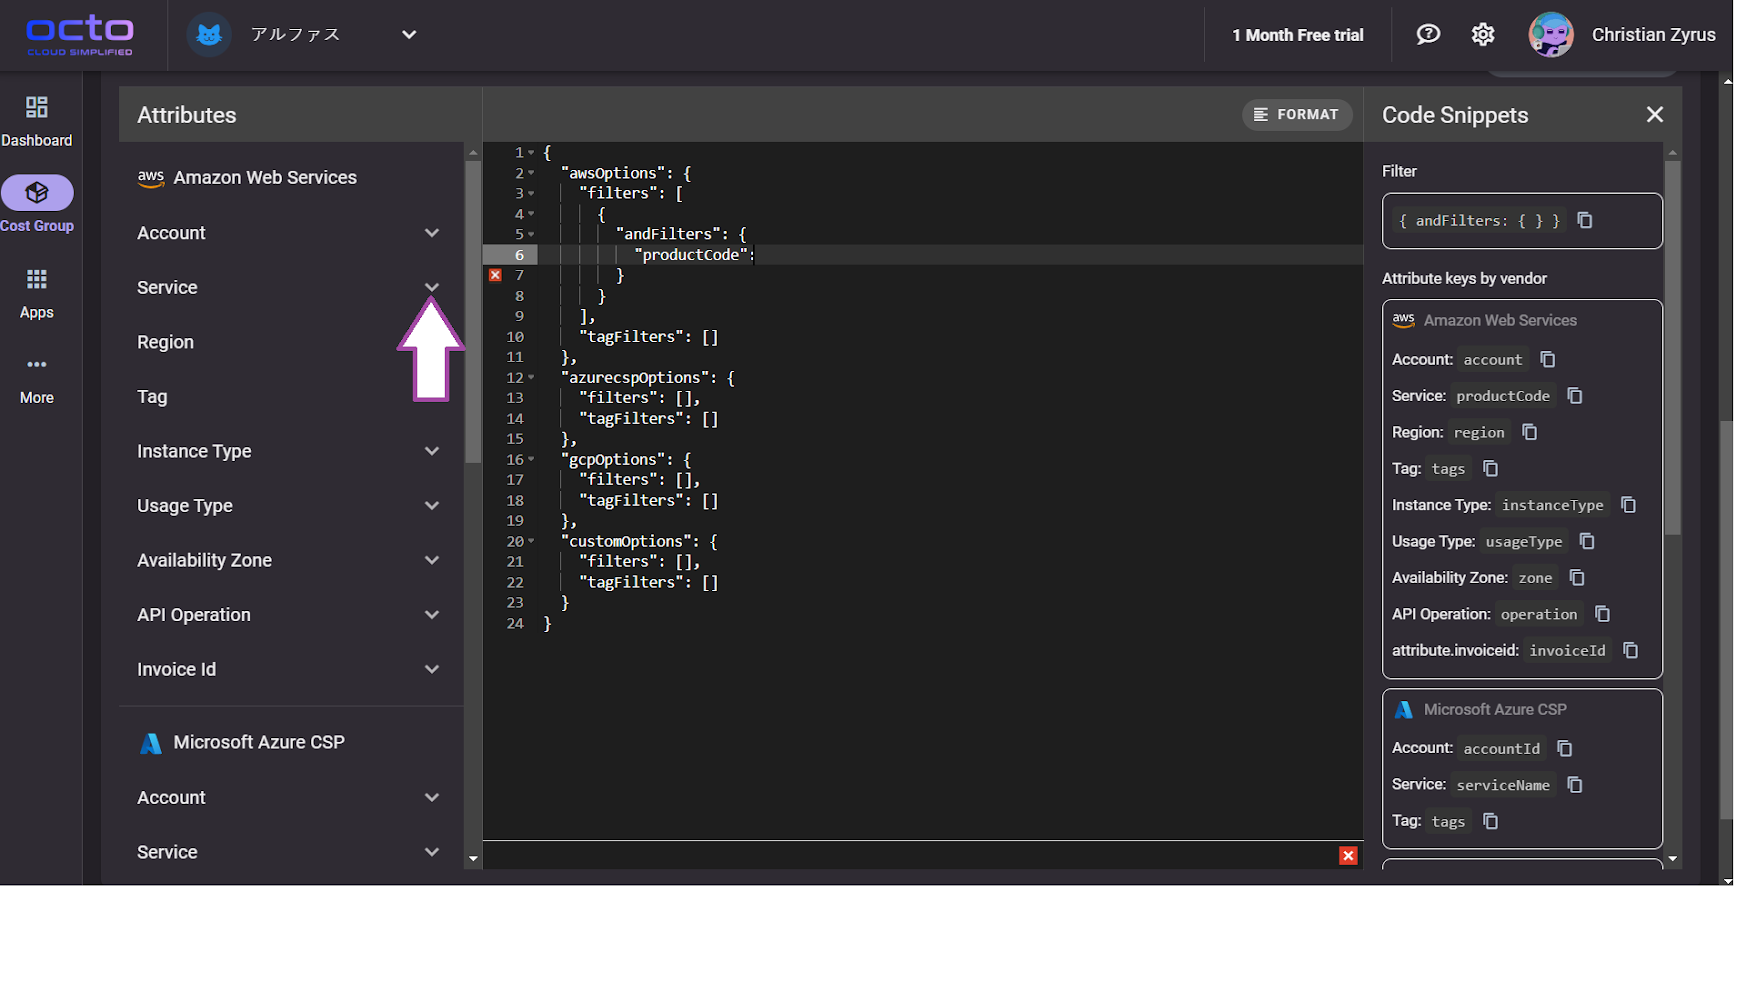
Scenario 4 | Multiple Combinations | Select two or more categories Same setup on previous scenarios except you add an additional filter.
- Simply append an extra "andFilters" based on the number of categories you wish to incorporate in order to establish a cost group.
Note: This setup also applies to other vendors and categories. You also have the option to incorporate categories from various vendors simultaneously. Simply apply the filter of your choice to each vendor individually.
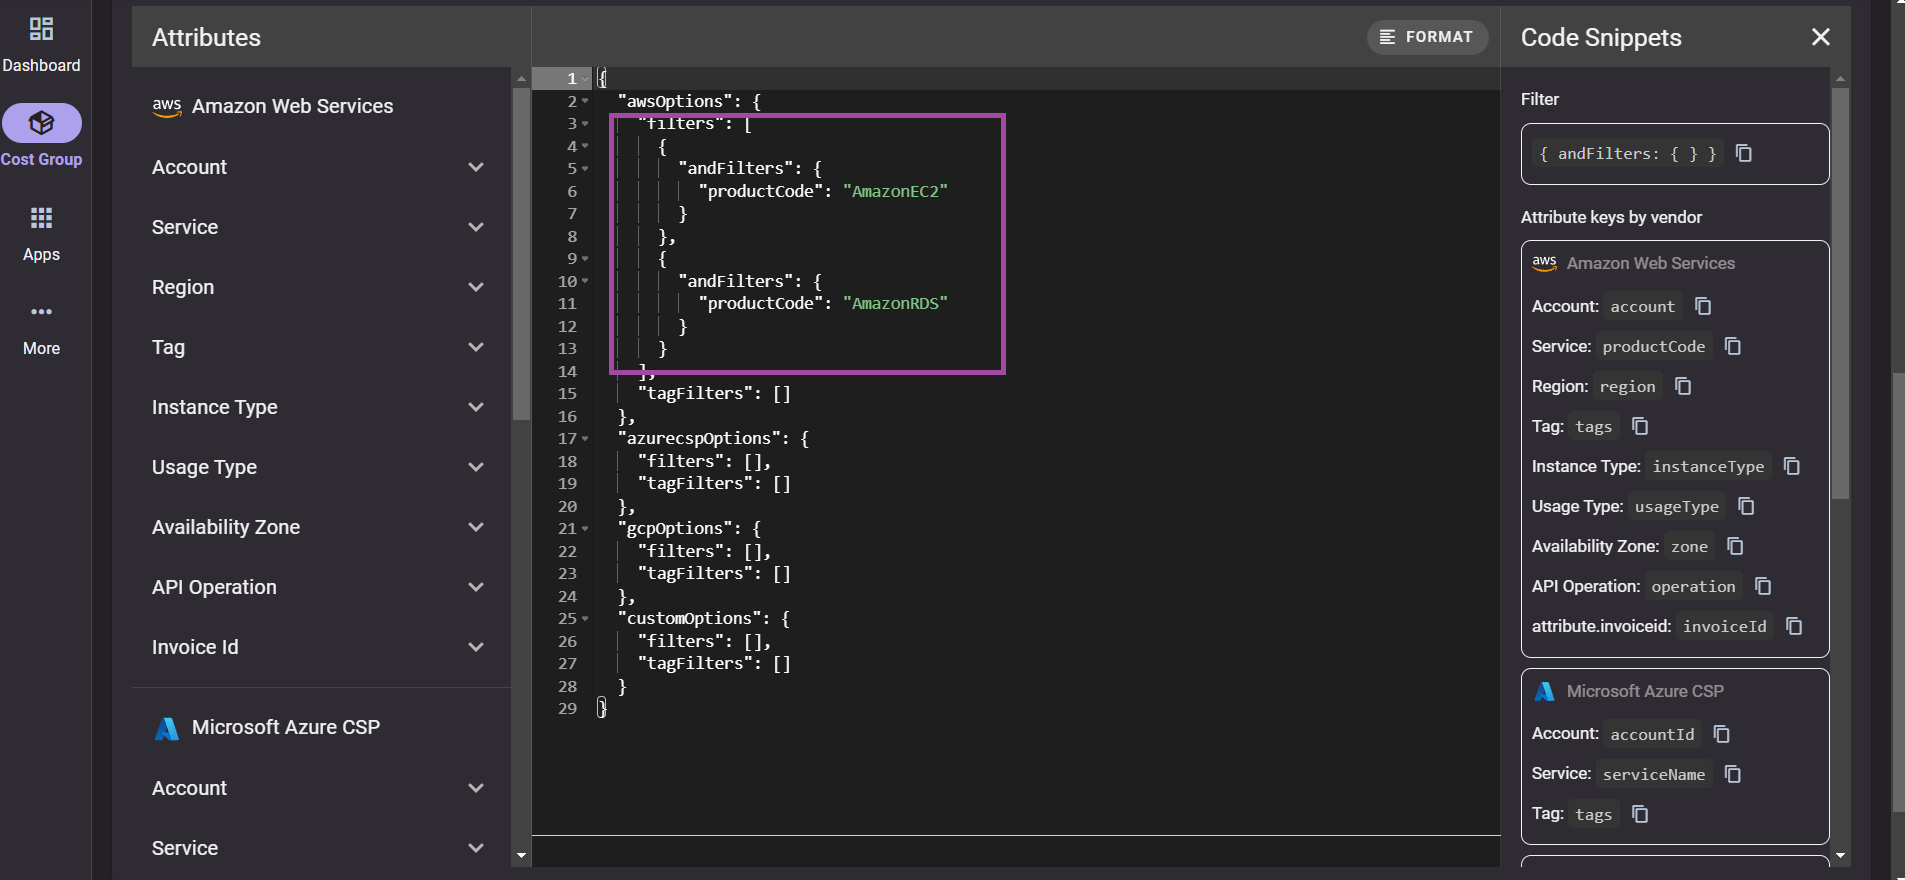
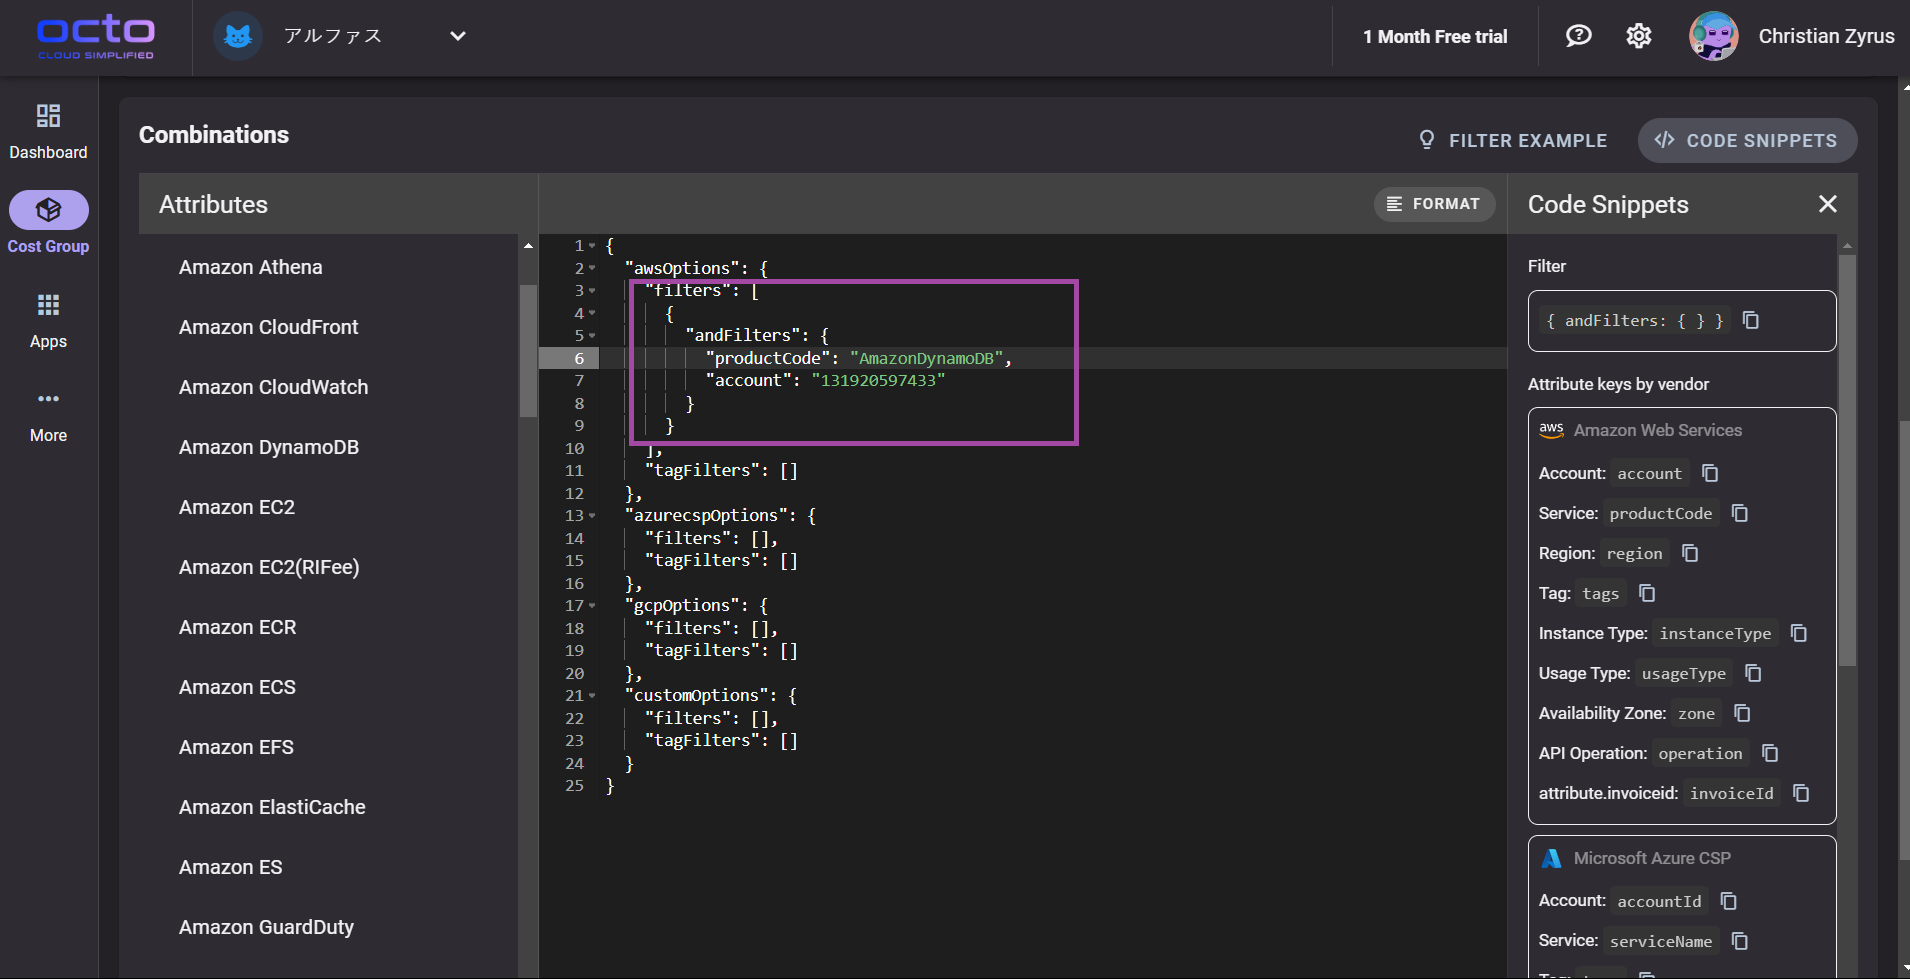
Scenario 5 | Multiple Combinations | Include in the cost group AWS DynamoDB service with a specific account.
Same setup on previous scenarios except you add an additional filter inside the "andFilters".
In this scenario, it implies that you are specifically choosing only AWS DynamoDB under a particular account.
- Insert the preferred categories within the "andFilters."
Note: This setup also applies to other vendors and categories. You also have the option to incorporate categories from various vendors simultaneously. Simply apply the filter of your choice to each vendor individually.
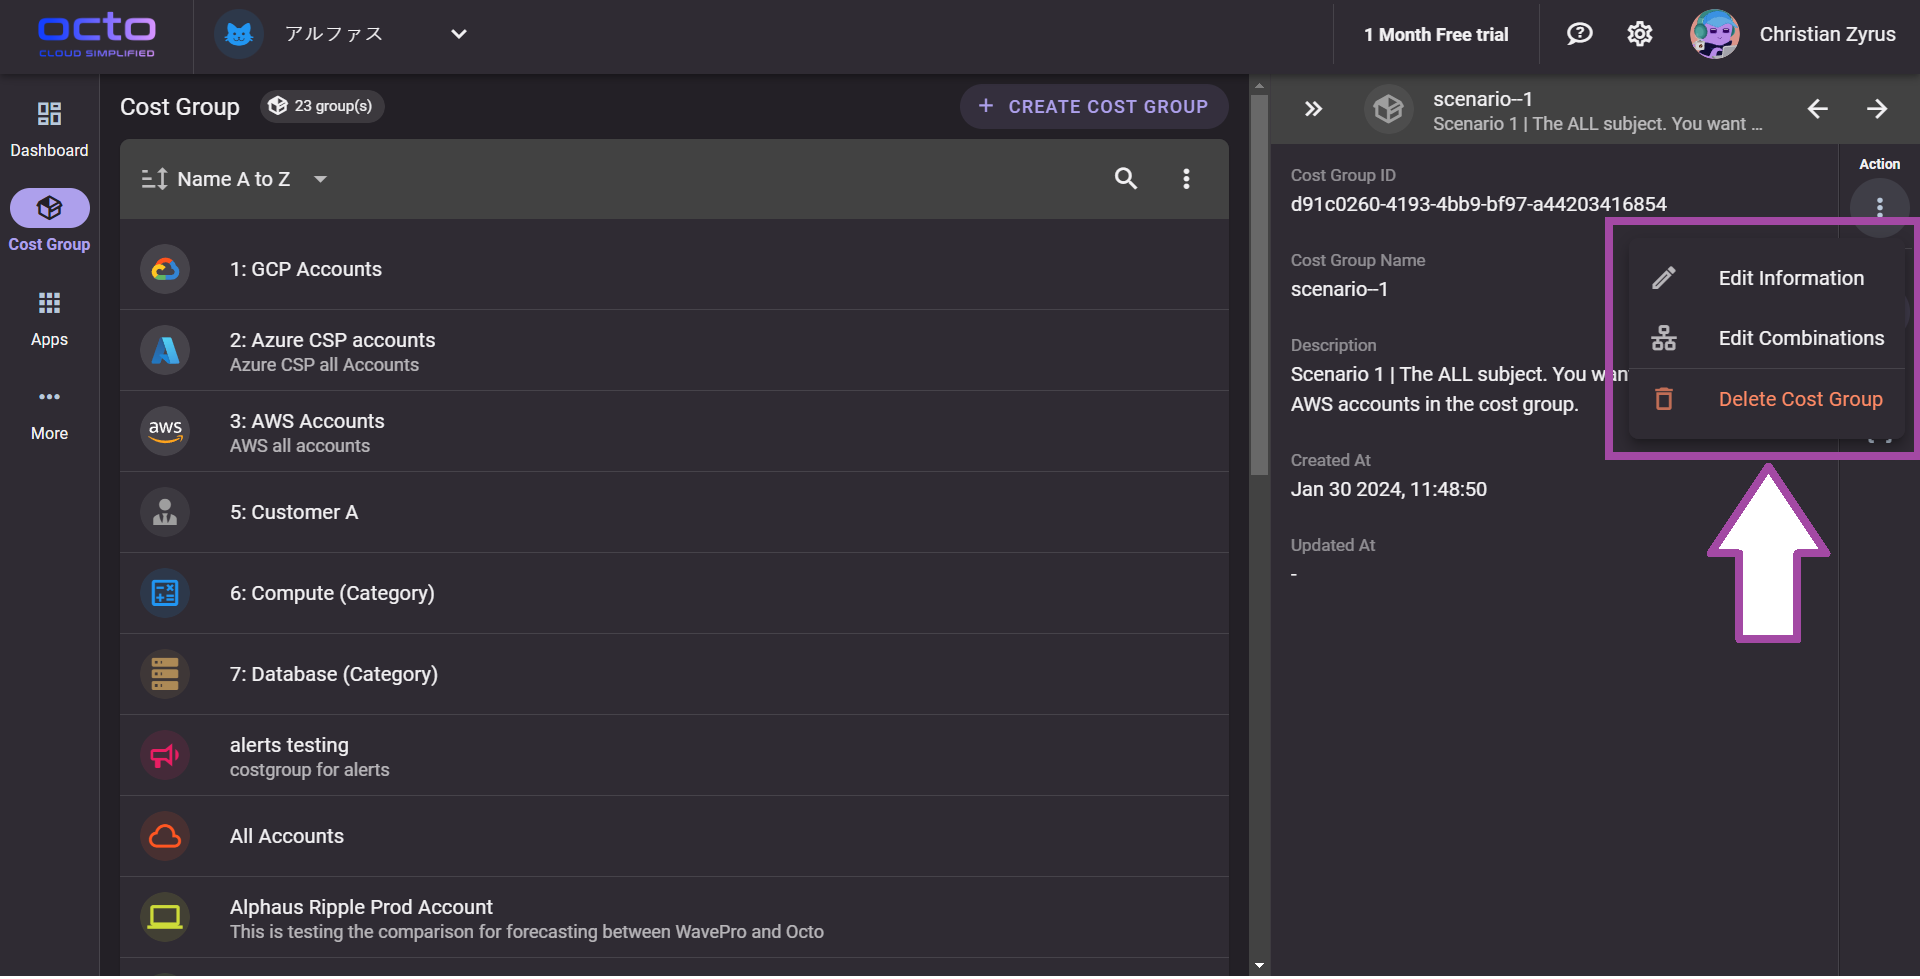
Edit and Delete Cost Group
Only Admin OCTO accounts can edit cost groups which can then edit combinations. Access Cost Groups from the left side panel section and then click your desired cost group. On the side drawer which slides out from the right side, click the side menu on the upper right corner. You can select between editing the combination info, the combination itself, or delete it.